If you’re looking for a way to keep the little ones entertained, why not try some simple crafts for kids? Crafting with little ones can be a lot of fun, and it’s also a great way to teach them about colors, shapes, and textures.
But, not sure where to start? No problem! We’ve put together a list of 10 easy kids crafts that are perfect for little hands! Keep reading for step-by-step instructions and tips on making the most of your crafting experience with the entire family.
Easy crafts for kids to try
Whether you are searching for the perfect craft or a fun project to keep your little ones entertained, these easy-peasy crafts for kids are all super simple and require minimal craft supplies. And, crafting is also a great way to develop fine motor skills in younger kids!
Check out our ten favorite easy crafts below.
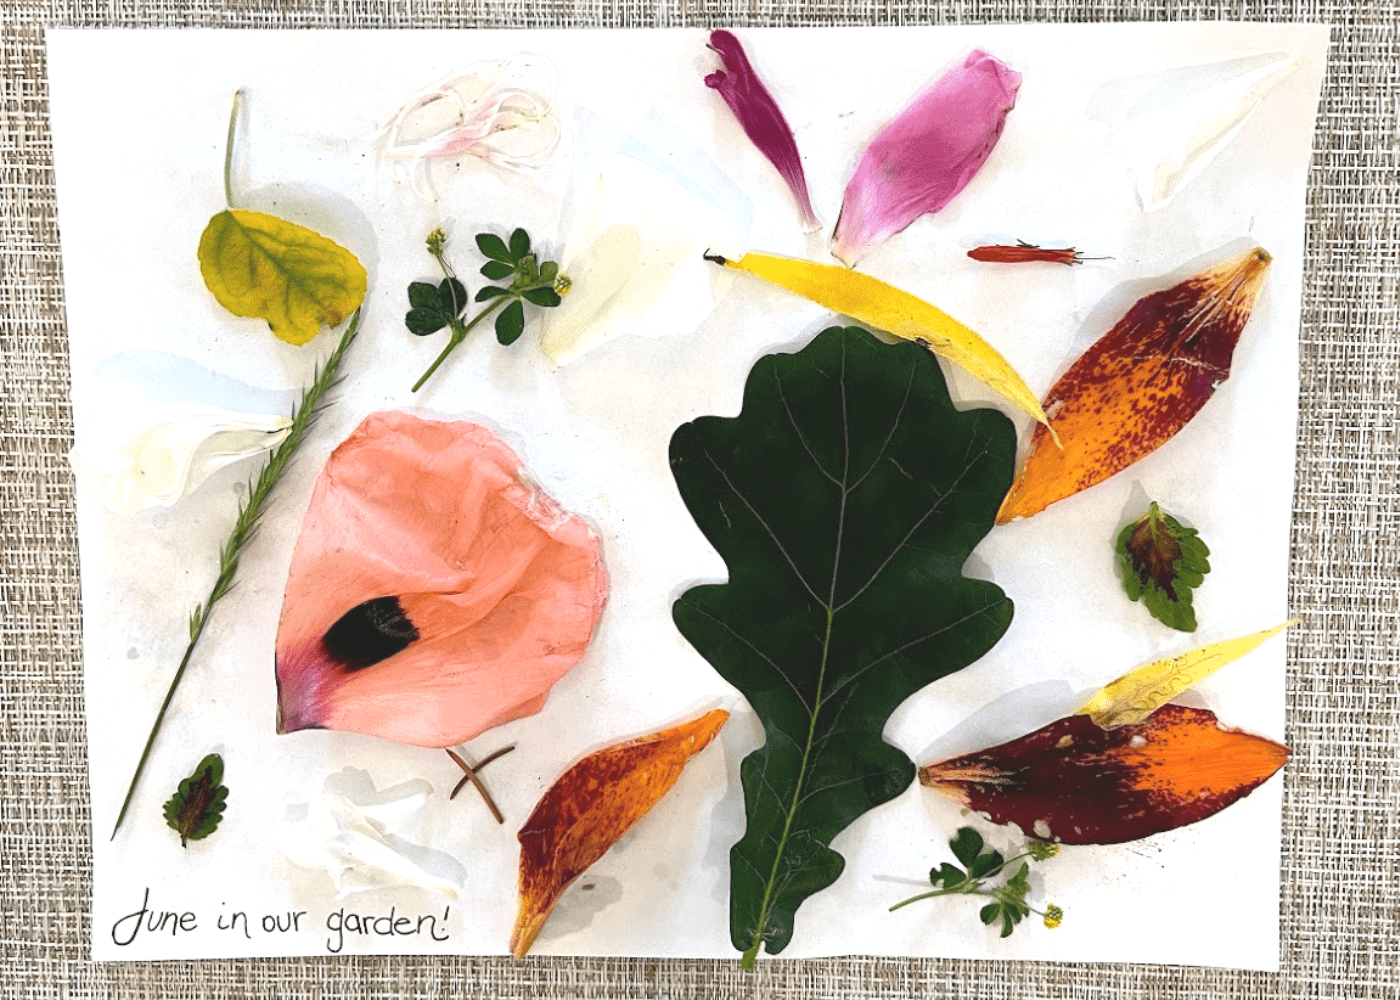
1. Create a nature collage
Next time you’re on a nature walk, bring a basket and collect some fallen items for collaging. I love easy crafts like this that accompany a fun activity, as it extends the activity time and creates a memorable keepsake.
Collect flowers, leaves, and other nature items that children can create a beautiful arrangement with. You can either create a collage in nature by making arrays of materials on the ground, or you can dry the items to create a more permanent piece of art.
If you make a more permanent collage for display, glue the items down in an array to make a picture. Make sure the items are flat enough that you can fit them inside the frame! Or, to use larger items like pinecones, use a shadow box.
For more nature crafts, check out this post: 10 Adorable preschool nature crafts.
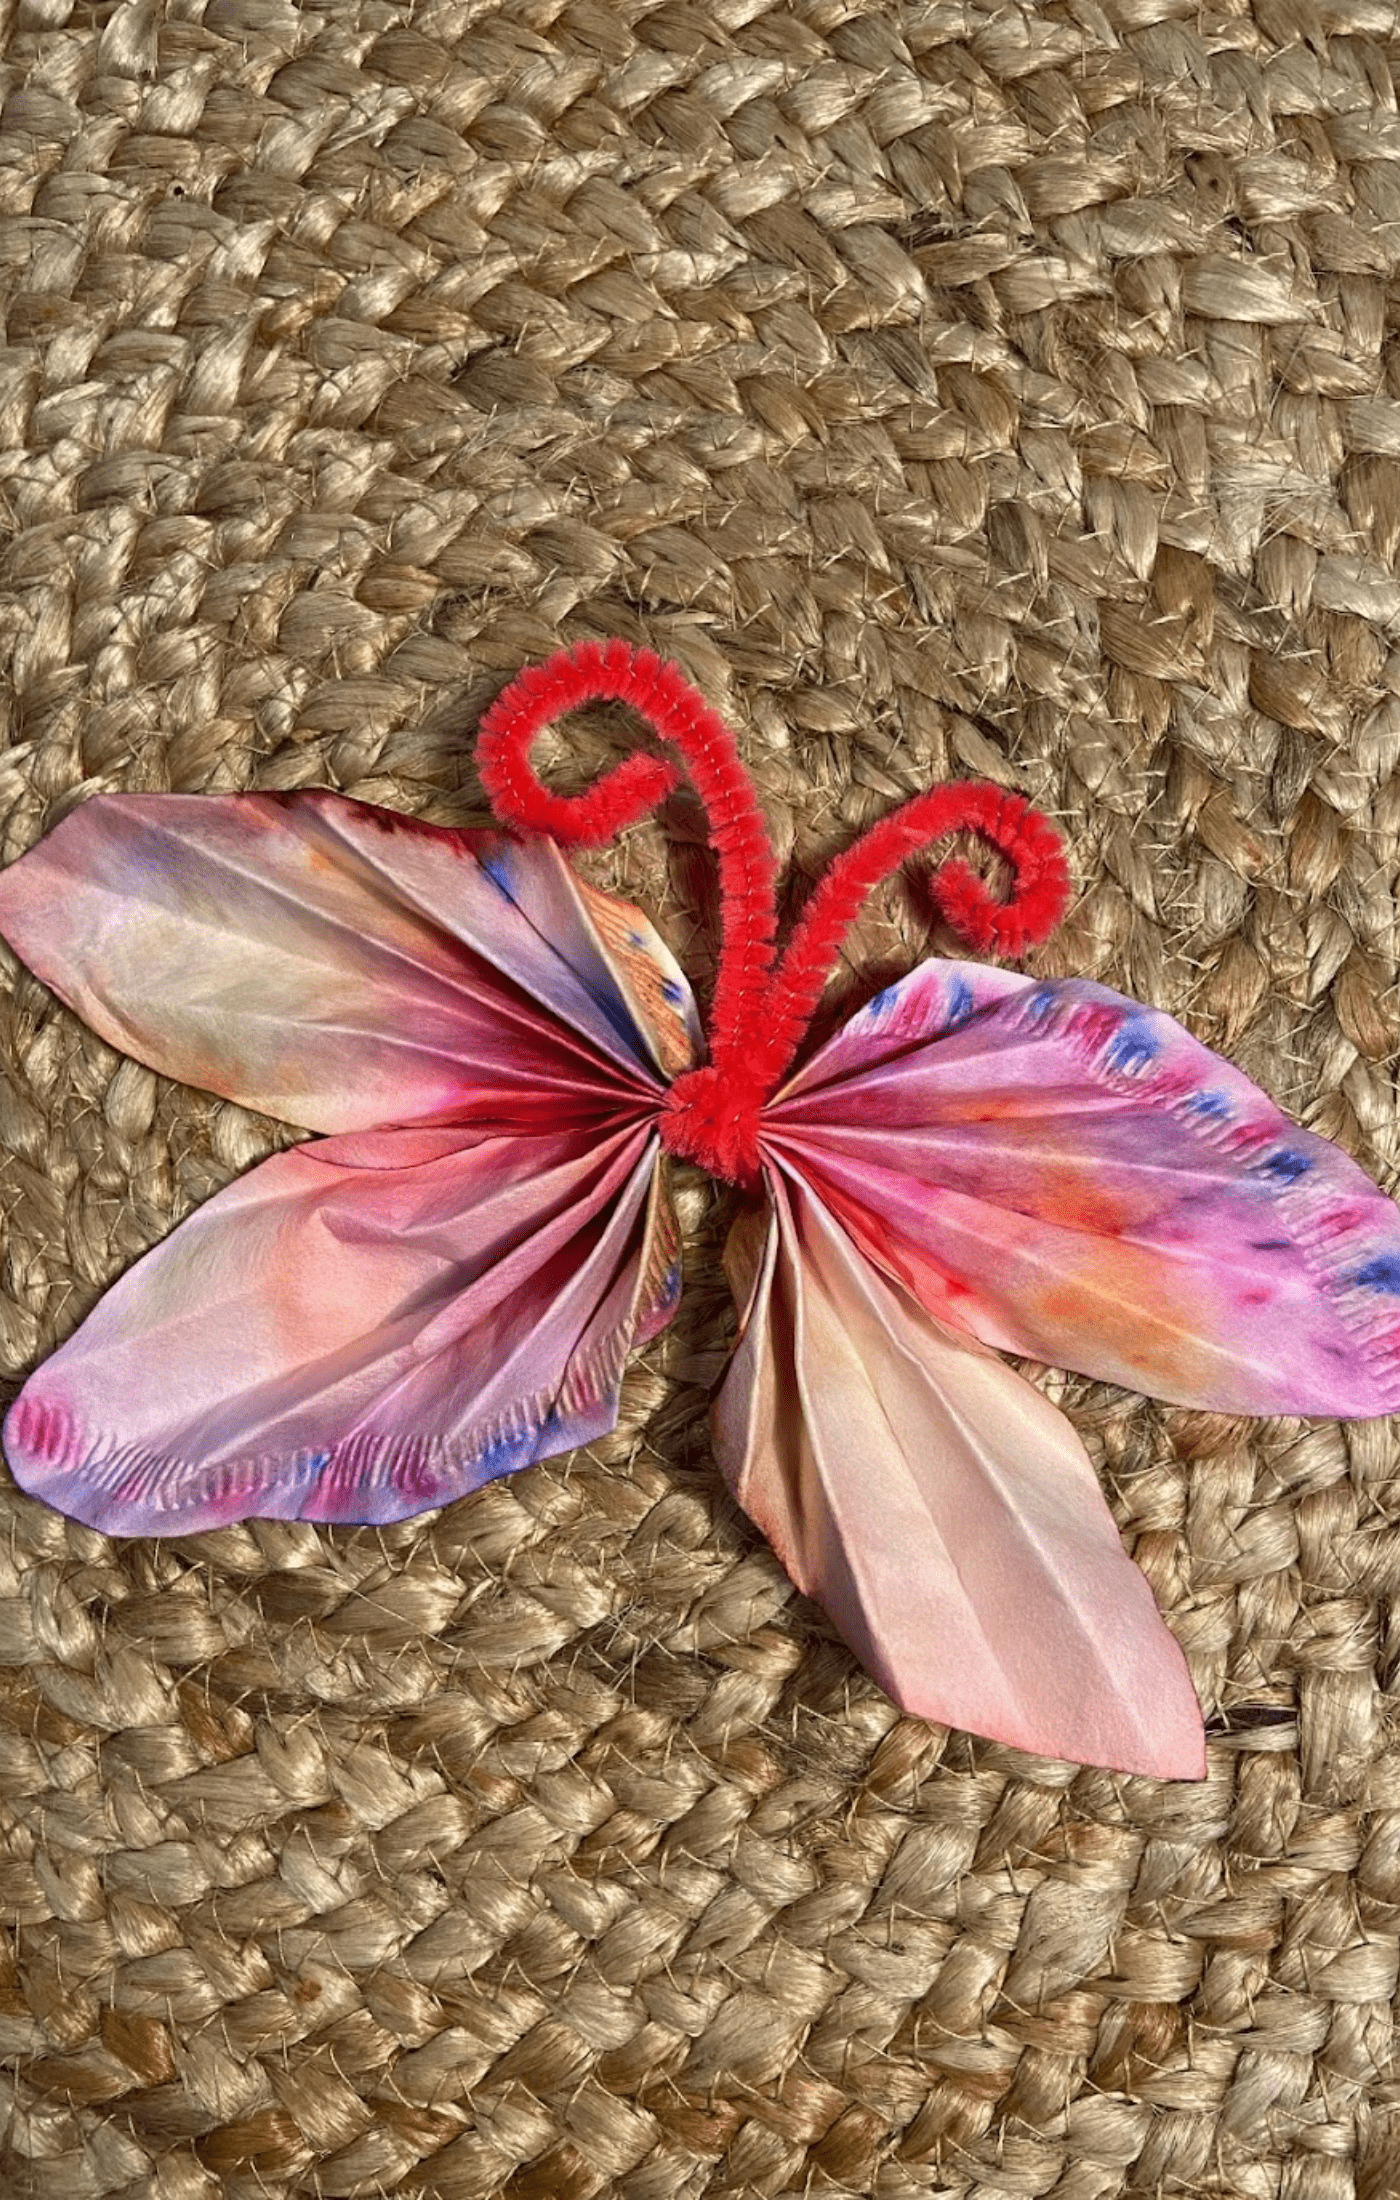
2. Coffee filter butterflies
Coffee filter butterflies are one of my favorite easy kids crafts because they require barely any supplies! With pipe cleaners, coffee filters, and washable markers, your children can design their own butterflies and practice fine motor development as they spray them with water.
Stack two filters together on a surface that can watch the water like a baking pan or a plate, draw designs all over the top filter with washable markers, and spritz them with water to spread the colors all over the filter. Once they are dry, separate and fold the filters in an accordion pattern. Stack the folded filters on top of each other to create “wings” and secure them in the middle with a pipe cleaner. Use the excess pipe cleaner to make antennae.
For a walkthrough of the craft with pictures for each step, head to my post: Coffee filter butterfly craft for kids.
BTW: You could also follow the folding steps with tissue paper to make simple butterflies, but the drawing and spraying water technique won’t work for designs.
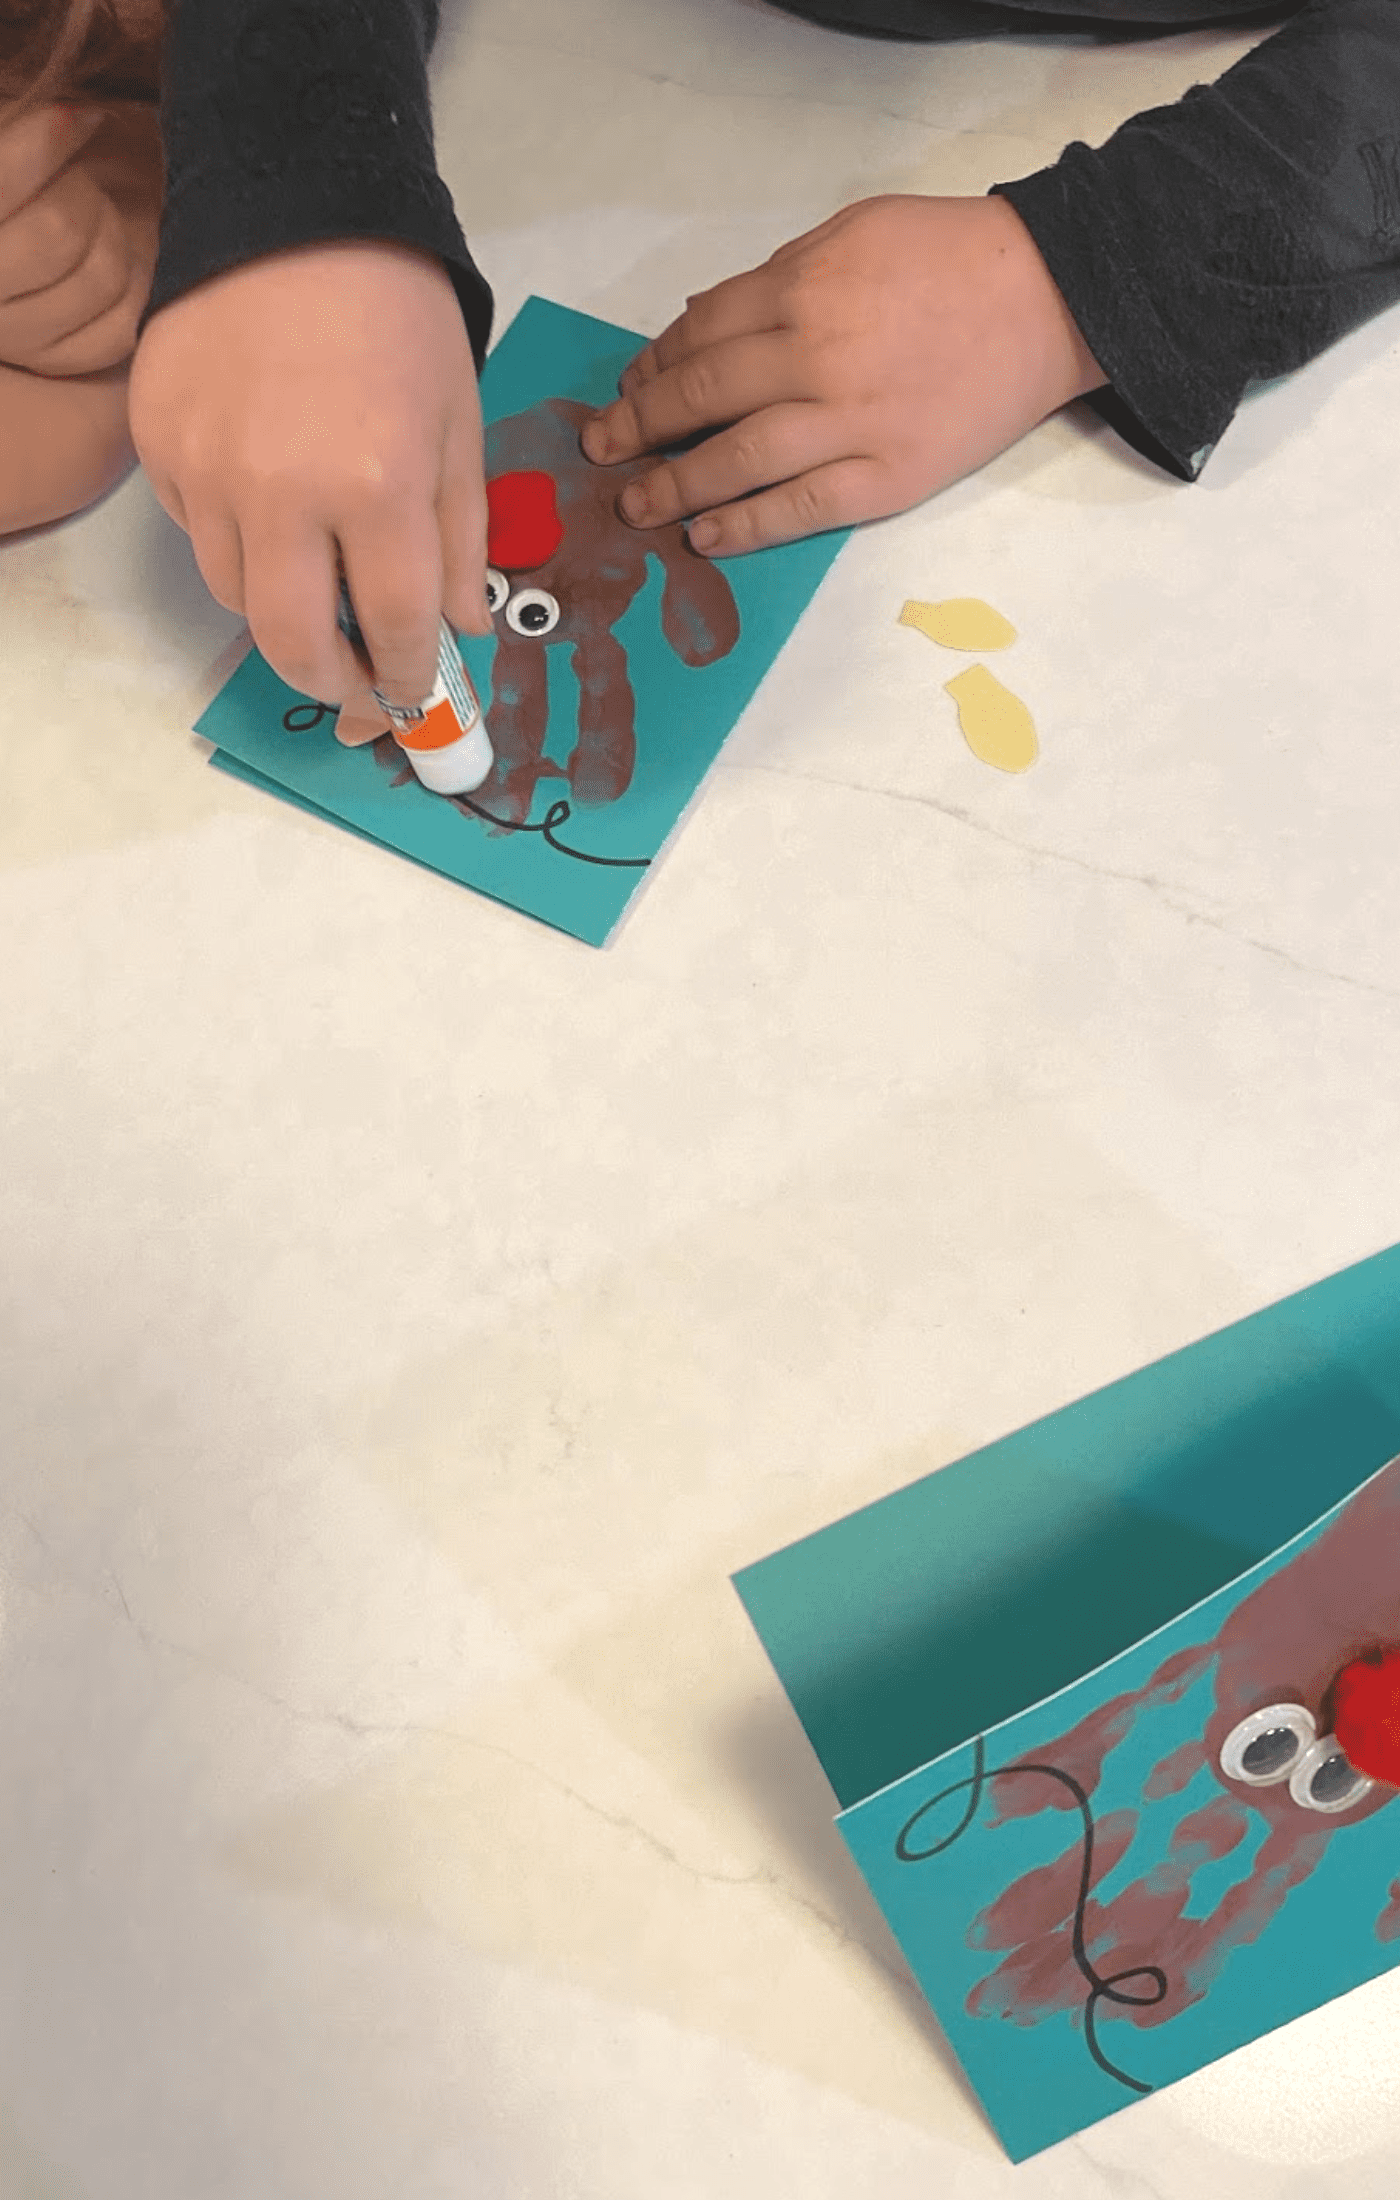
3. Handprint cards
Turning a kids craft into a meaningful gift is so much fun! The photo above was from a set of handmade Christmas cards we made. We also made handprint Santa Clauses and handprint Christmas Trees… They were all adorable! They make for super sweet and personalized little cards.
All you do is paint the child’s hand with washable non-toxic paint and help them press it onto a piece of colored cardstock! Simple, right? We later added paper lights to the black line for more decoration. You could also use yellow paint to make the lights if you want. Or, you could do colored thumbprints for details like the nose and eyes to keep it 2D.
You could use colored construction paper for other colorful handprint paintings, but if you’re giving them as cards cardstock is a better option.
Since we made a bunch of these cards at once, the little ones wrote one Christmas message and we photocopied one for each card. This way, they didn’t get tired from writing, but everyone in the family got a handwritten note.
Pro tip – If your young ones are still learning to write, but want to write their own Christmas message, you can write it first in highlighter for them to copy over. The highlighter won’t show when you photocopy it.
4. Paper plate animals
This is a fun animal-themed craft that uses paper plates as the base. Simply have your child cut out the shape of their desired animal from a paper plate and then decorate it as they please.
They could use markers, glitter, or paint to decorate them, but my advice is to stay away from acrylic paint and opt for washable non-toxic paints like those from Crayola since acrylic can be hard to clean when dry.
Check out the video above for some inspiration and a simple tutorial!
5. Paper plate masks
These masks are sure to inspire some imaginative play! All you need is paper plates, glue, markers or paint, ribbon (optional), and any other decorations or embellishments you like. Cut out the shape of a mask from your paper plate and then let your littles decorate.
If desired, you can add ribbon for ties to keep it securely in place. Or, you could glue a large popsicle stick or craft sticks to the bottom of the paper plates so the children can hold it up. Your kiddos will have so much fun pretending they are the character they made!
Or, you could make one of the animals from the video above and cut out eyes rather than gluing googly eyes on! Then, hole punch a spot on each side for ribbon or glue a popsicle stick on the bottom.
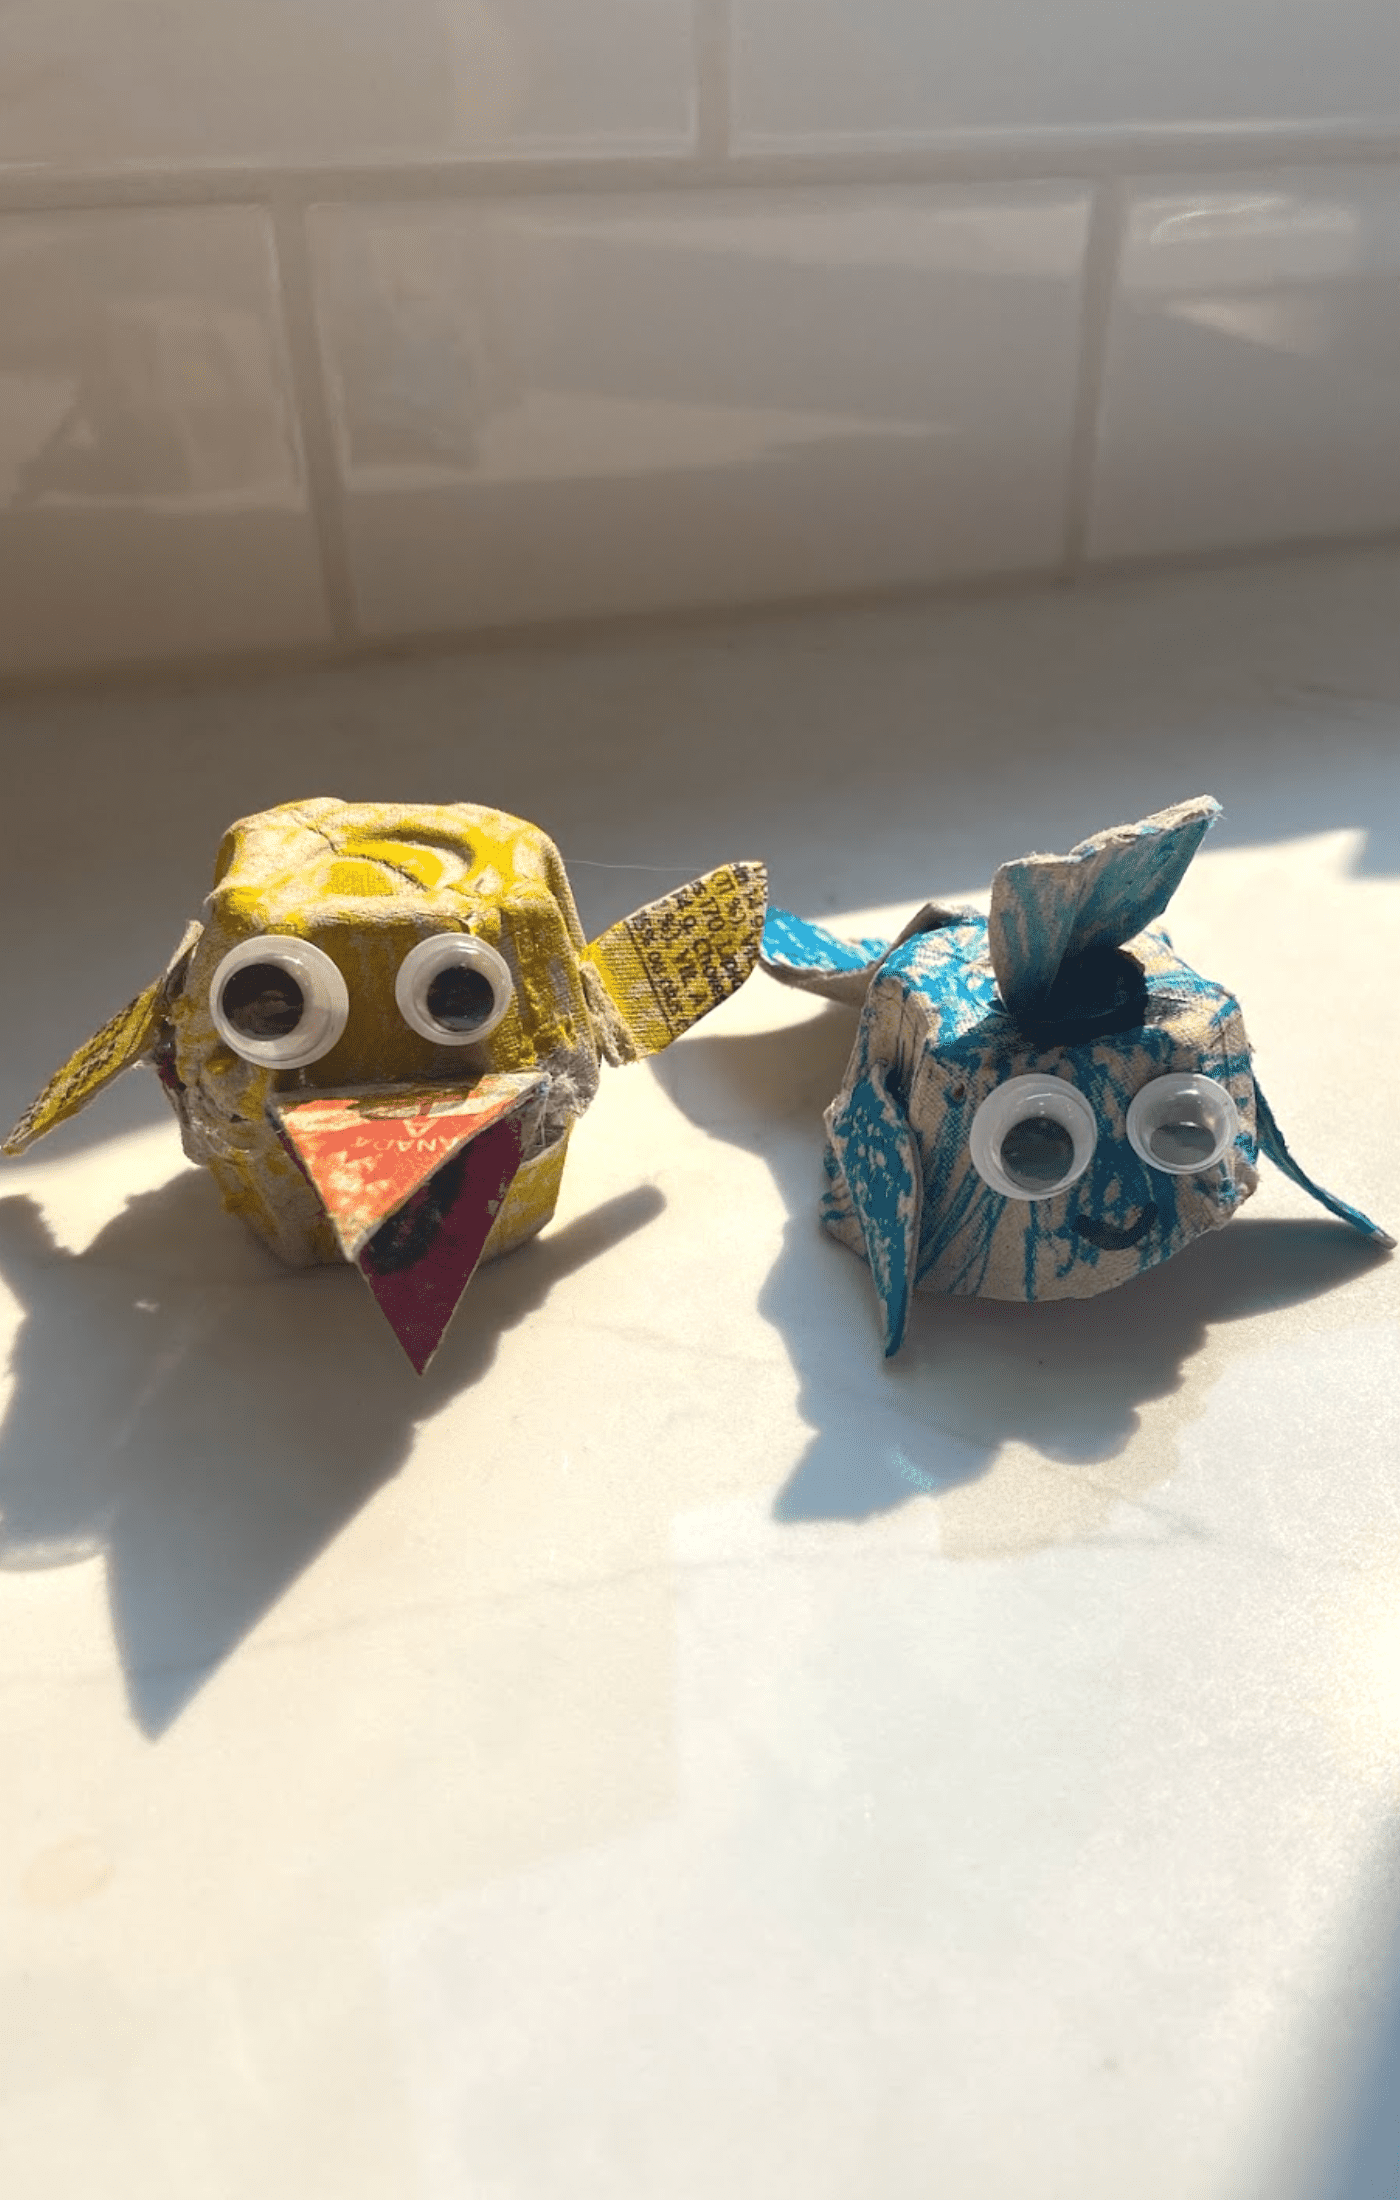
6. Egg carton creatures
This is one of the many cute crafts you can make from pieces of egg cartons. The kids will love making them as much as they enjoy playing with them, too.
For this project, you will need an egg carton, paint or markers, and googly eyes. Since the pieces are tough to cut, have an adult cut out the desired shapes. We also needed to use hot glue, which is an adult’s job! You could also use white school glue.
To make a creature, cut the individual cups out of the egg carton and then paint them however you like. Once dry, add embellishments and eyes. You will be surprised how long children will enjoy playing with these cute little designs!
7. Toilet paper roll binoculars
These binoculars are perfrct for lbttle explorers. All you will need is two toilet paper rolls, string, tape, and decorations (optional).
Simply tape the toilet paper rolls together in the middle and then decorate as desired. Attach string to each end of the binoculars so that they can be worn around the neck. If desired, let them decorate!
8. Popsicle stick puppets
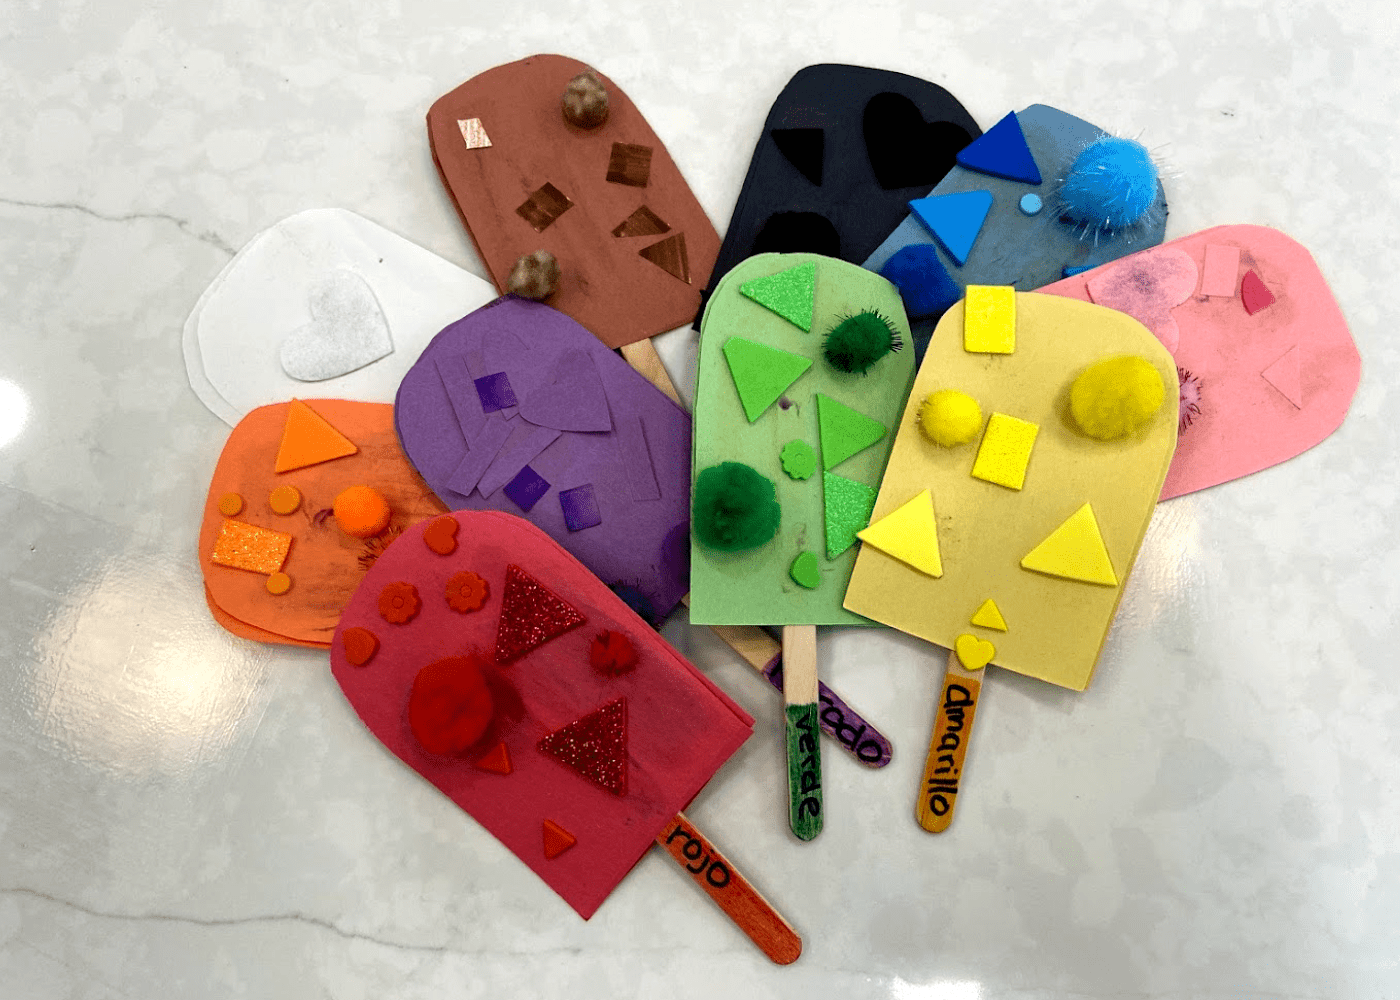
This is a fun craft that can be made with just a few supplies. You will need popsicle sticks, glue, markers, and any other materials you want to use to decorate your puppet. Simply glue the sticks together to form the puppet’s body and then decorate as desired.
You could make animals, people, or pretend popsicles like we did! The ones pictured above were used to practice learning Spanish colors, where the kiddos could “order” whichever color they wanted. They were fun to make and acted as a learning tool!
9. DIY rain gauge
Making a DIY rain gauge is a super simple craft that lets children learn about the science of weather! All you need to do is cut the top off of a bottle, draw a horizontal line every cm of the outside with a permanent marker, and place some rocks inside to keep it from falling! The craft itself only takes five minutes to make, but the fun of measuring rainfall will extend throughout the day.
Make sure you measure the cms of rainfall after the first line, since the rocks will displace water and won’t give an accurate reading from the bottom!
To learn more about this craft and the science your children can learn, head over to my post here!
10. Cardboard tube cars
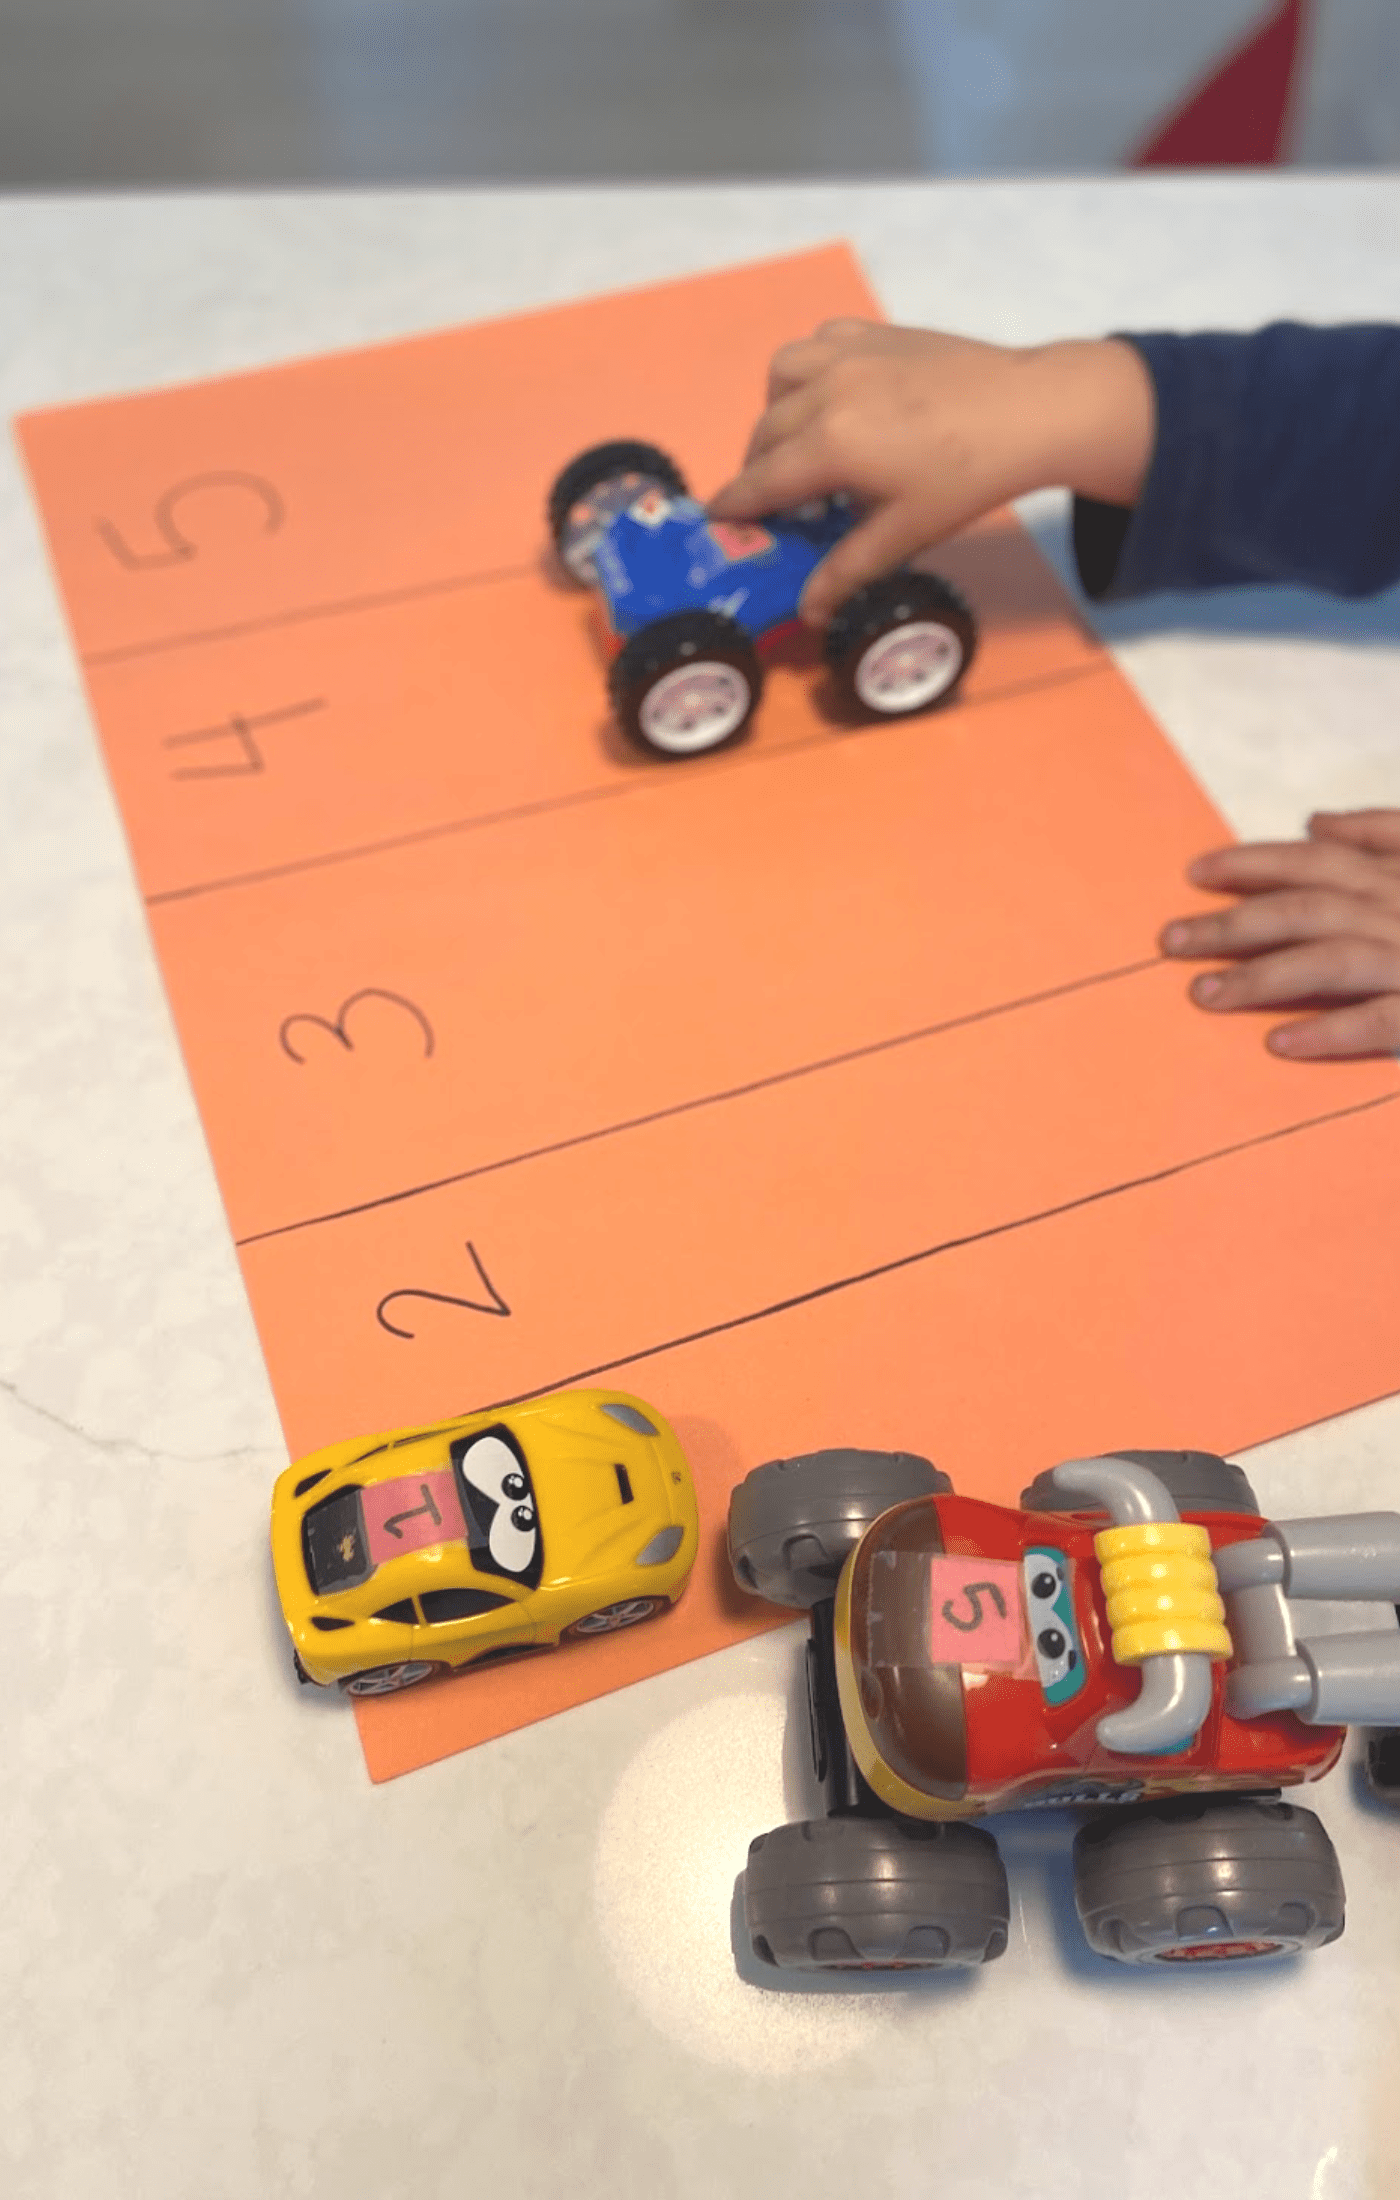
Cardboard tubes can be transformed into all sorts of things, including cars! For this project, you will need cardboard tubes, wheels (can be made from cardboard, bottle lids, or foam), markers or paint, glue, and anything else you want to use to decorate your car. Glue the wheels onto the cardboard tube car body and then decorate as desired.
To make the parking garage activity for number practice, simply write out numbers 1-10 (or however many cars you have). Then, put a number on each car that corresponds to a parking space.
Making the most of craft time with your children
When it comes to crafting with kids, there are a few things you can do to make the experience more enjoyable for both you and them.
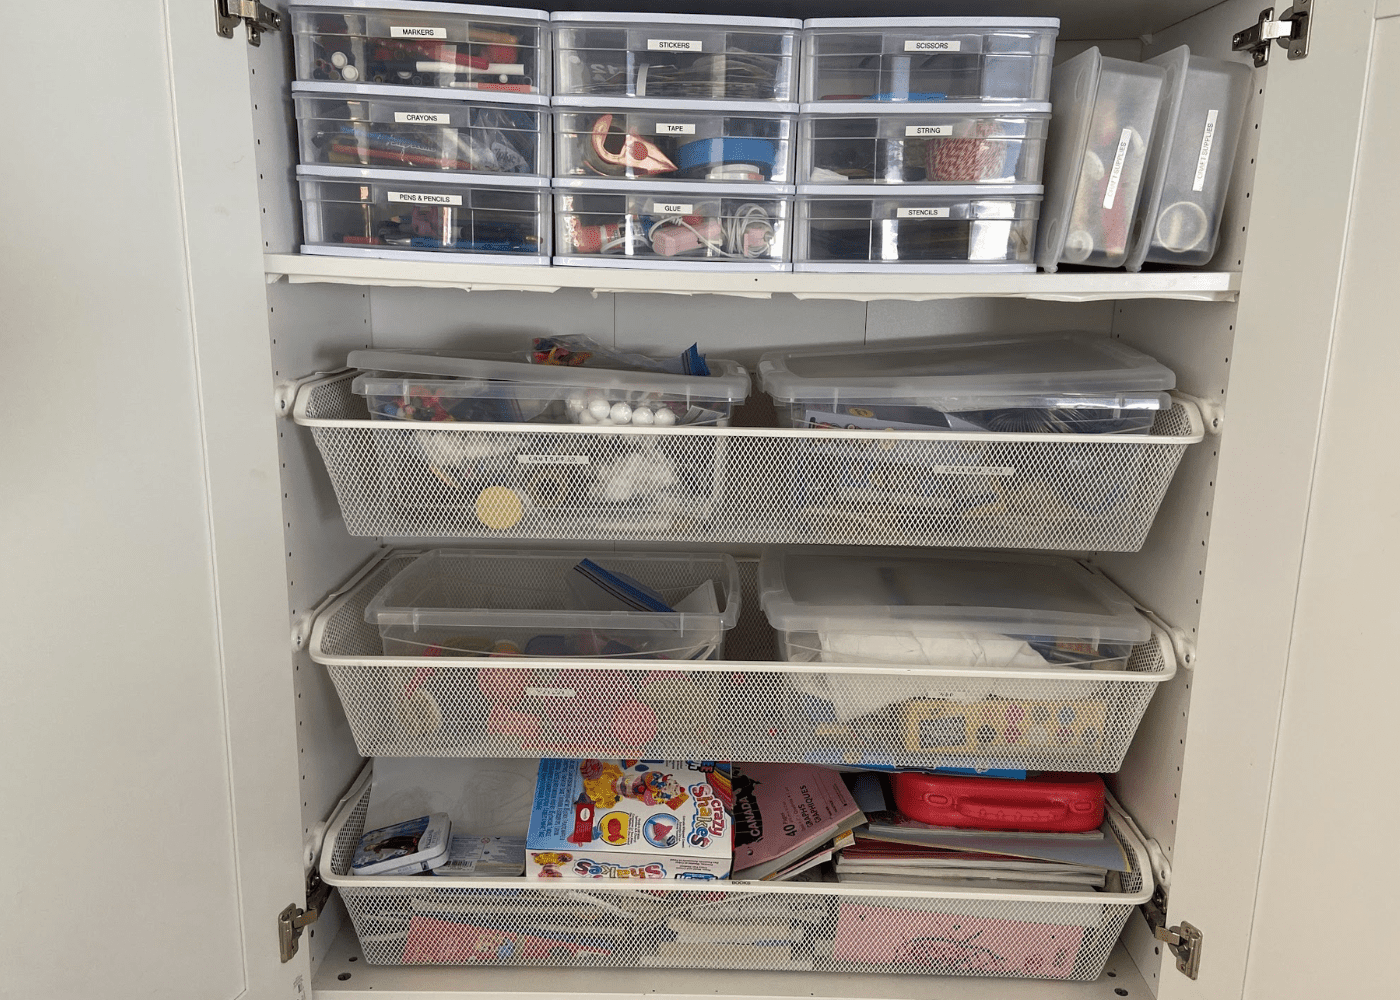
First, it’s important to have a designated space for crafting – whether that’s a corner of the playroom or a specific craft table. This will help minimize mess. It’s also helpful to have all necessary supplies easily within reach so that kids can grab what they need without having to search through drawers or boxes.
Another tip is to plan ahead as much as possible. This means having a general idea of what you want to make before starting and gathering all of the supplies you’ll need ahead of time. This will help the crafting process go more smoothly and avoid any frustration on your part. If you need to prep, do it before, so the kids don’t get antsy waiting for you to do prep work while they craft.
It’s also essential to ensure that even easy crafts are the appropriate skill level for your child. If they require too much adult help, it won’t be as fun making their craft! Older kids will have much better fine motor control and patience and can do more advanced crafts. But, for little ones, stick to basic painting or crafts that use kid-friendly materials. Make sure always to maintain adult supervision to ensure safety!
Finally, it’s important to be patient when crafting with kids. They may not always follow your instructions perfectly, but that’s okay. And, what they make likely won’t resemble the Pinterest version you looked at online – Which is also okay!
Encourage them to be creative and experiment, and let them know there is no right or wrong way to do things. Emphasize enjoying the process over the end result.
Kids craft supply storage
Crafting with kids can be an incredibly fun and educational activity. It allows children to explore their creativity, think outside the box, and learn new skills. Plus, it’s a great way to spend quality time together as a family.
That being said, crafts for kids often require a ton of supplies! From colored construction paper to pipe cleaners and pom poms, it’s tough to keep projects and craft supplies organized.
Here are some tips:
- Create a craft binder for each child: Grab a large binder and some sheet protectors so your children can store their crafts and drawings. This is a super easy way to keep their creations safe and minimize mess! Have them design a cool cover page to make it their own.
- Organize everything with clear tubs and storage bins: Having them clear means kiddos can see what is inside, reducing the chance they will take out all of the craft supplies for just one craft. You can also make big labels together so they learn what goes where.
- Use file folders for craft paper organization: I like to keep a folder for scrap paper, loose construction paper, and one for assorted crafting papers like origami paper. By having them in files, it’s way easier to find what you need.
Get more tips and tricks for storing all your craft supplies in our post.
