
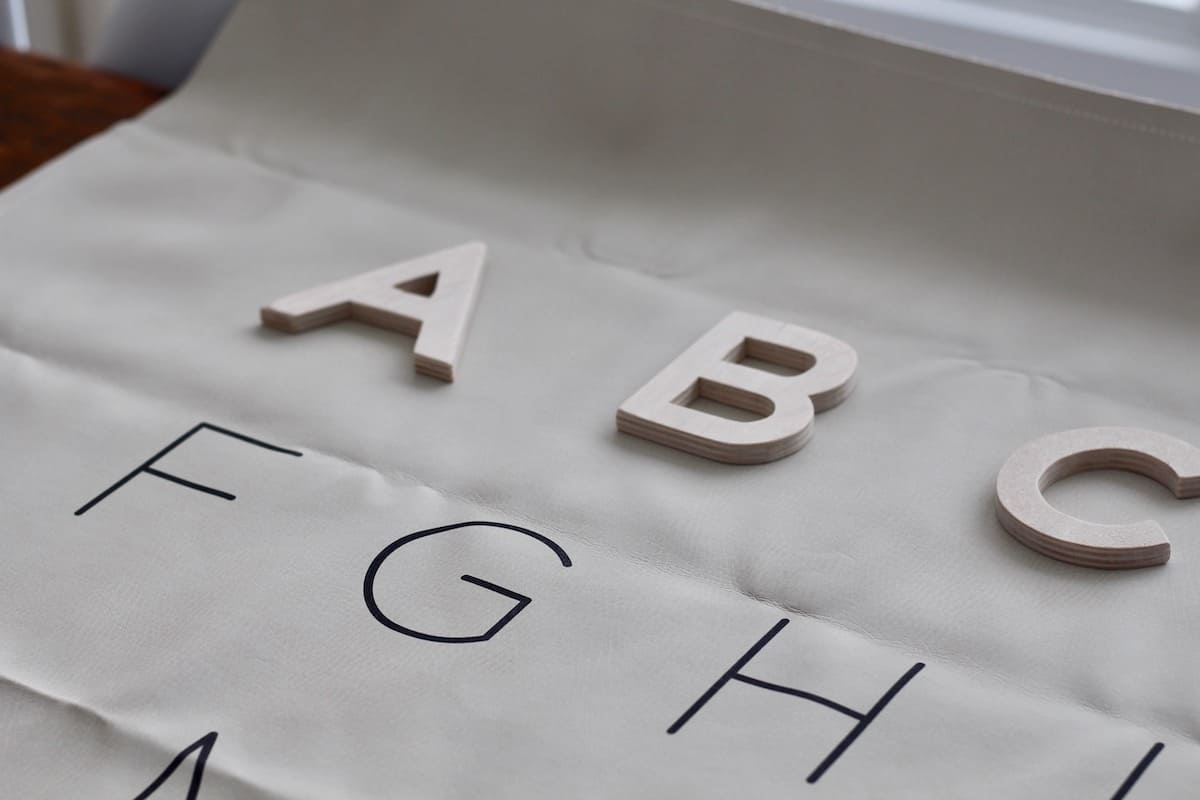
Wooden letters are one of those projects that look impressive but are genuinely manageable with the right tools and a little patience. We made a full set of alphabet letters in Grandpa’s woodshop, cut from plywood with a scroll saw and sanded by hand. They have held up beautifully, and the kids use them almost every day.
This post walks through every step, from choosing your wood to finishing the edges. If you are new to woodworking, this is a good beginner project. If you already have some experience, it goes even faster.
How these wooden letters get used
We made this set for alphabet learning, and it has been worth every hour of work. The kids match the wooden letters to printed letters on a mat, which builds letter recognition in a hands-on way. It is a simple activity that holds their attention much longer than a worksheet would.
Spelling practice is another great use. If you plan to use yours for spelling words, cut extra copies of common letters. Vowels, T, N, S, and R show up in almost every word, so having multiples on hand makes a big difference. You can also choose to cut lowercase letters instead of capitals, or do both if you have the time.
Beyond early literacy activities, wooden letters work well as home decor. We put some up on the kids’ bedroom doors. A child’s name spelled out in natural wood looks clean and personal without being overdone. Even just an initial works well.
What you need to make wooden letters
The supply list for this project is short. You need high-quality plywood, a scroll saw, a pencil, sandpaper, and paper for making letter templates. That is really it. The quality of your plywood matters more than anything else on the list, so it is worth taking time to find the right sheet before you start cutting.
Step 1: Choose your plywood
Standard hardware store plywood tends to chip along the cut edges and resists sanding to a smooth finish. We tested a few sheets and were not happy with the results. For something you want to last for years, that quality just does not hold up.
We ended up buying Baltic birch plywood from a specialty plywood store. It is a much higher quality product with tight, consistent layers and a smooth surface. It is the same type of material used in well-made European wooden toys. Yes, it costs more than regular plywood. But for a set of letters that will get handled daily by kids, it is the right choice.
Pallet wood is sometimes suggested as a budget option. It can work, but in our experience it behaves similarly to low-grade plywood. The grain is unpredictable and the sanding takes longer. If you are making a decorative piece that will not get much handling, pallet wood might be fine. For a toy or learning tool, we recommend Baltic birch.
Step 2: Practice on scrap wood first
Because Baltic birch costs more, it makes sense to practice your cuts on scrap plywood before touching the good sheet. This is especially helpful if you are not completely comfortable with your scroll saw yet.
Practicing also helps you figure out how to handle curves and tight corners before you commit to the final material. Please read and follow all safety instructions for your scroll saw before you begin. Power tools require full attention and proper precautions every single time.
Step 3: Make paper letter templates
Before you mark anything on the wood, create paper templates for each letter. You can print letters from your computer, trace them from a book, or base them on a font you like. Templates let you settle on the exact shape and size you want without using up any wood.
We used the font from an alphabet mat as our inspiration. My mom had spotted a similar style on Instagram and loved the look of it. Simple, blocky fonts without thin strokes or serifs tend to work best for cutting. Very thin parts of a letter are harder to cut cleanly and are more likely to break with handling.
Step 4: Trace the templates onto plywood
Once your paper templates are ready, lay each one on the plywood and trace around the outside edge with a pencil. Press lightly. You will sand the letters after cutting, so any pencil marks that land inside the letter outline will disappear during finishing.
Take your time placing the templates on the plywood sheet. Arrange them efficiently so you get as many letters as possible from a single sheet without overcrowding the cuts.
Step 5: Cut out the letters
Cutting is the most skill-dependent part of this project. A scroll saw lets you follow curved lines and make tight turns, which makes it ideal for letter shapes. Move the wood slowly and steadily, keeping the blade on the outside of your pencil line.
Curved letters like S, C, G, and B require the most attention. Take your time with those. Straight letters like I, L, T, and H are much easier to cut and are a good place to start if you are building confidence with the saw. Again, follow all manufacturer safety guidelines for your specific scroll saw model.
Step 6: Sand every edge smooth
After cutting, each letter needs to be sanded until all the edges feel smooth to the touch. This is important for a toy that children will handle. Rough or splintered edges are not acceptable on something a child picks up and carries around.
Plain sandpaper works well for flat surfaces and most straight edges. For curved edges and tight spots, a nail file does a surprisingly good job. We used one on letters like S and B where the curves made standard sandpaper awkward to use. A fine-grit sanding block also helps for getting into corners.
Work through the sanding slowly. It takes longer than the cutting, but the finished result is worth it.
Finishing options for your wooden letters
We left our letters as natural wood. The Baltic birch has a warm, light tone that looks clean and fits well with most room styles. If you want more color or personality, there are a few easy options.
You can paint each letter a solid color or use acrylic craft paint to add patterns or designs. Another option is to cut decorative scrapbook paper to match the letter shape and attach it with Mod Podge. Both approaches work well and hold up to regular handling if you seal them properly with a topcoat.
If you are making letters for home decor rather than play, a light coat of beeswax or natural wood oil gives a polished finish without changing the natural color much.
Using wooden letters for learning
Wooden letters work especially well as a Montessori-style learning tool because children can hold and handle them. Touching the shape of a letter while saying its name is a multi-sensory experience that helps kids internalize the alphabet more effectively than visual-only methods.
You can set up simple activities like matching uppercase letters to lowercase ones, sorting letters by shape or size, or arranging them to spell family names. These activities pair naturally with other early literacy tips that support reading readiness at home.
If your child is working on letter recognition, you might also find our free alphabet tracing sheet useful alongside the wooden letters.
A project worth making
A full set of handmade wooden letters takes a few hours across a couple of sessions, but the result is something that lasts. Ours have been in regular use for years and still look great. The kids treat them as both toys and tools, which is exactly what we hoped for when we started cutting.
If you have access to a scroll saw and some quality plywood, this project is well worth the time. It is practical, personal, and much cheaper than buying a comparable set. And once you have the process down, making a second set for a friend or a gift takes no time at all.




Leave a Reply