
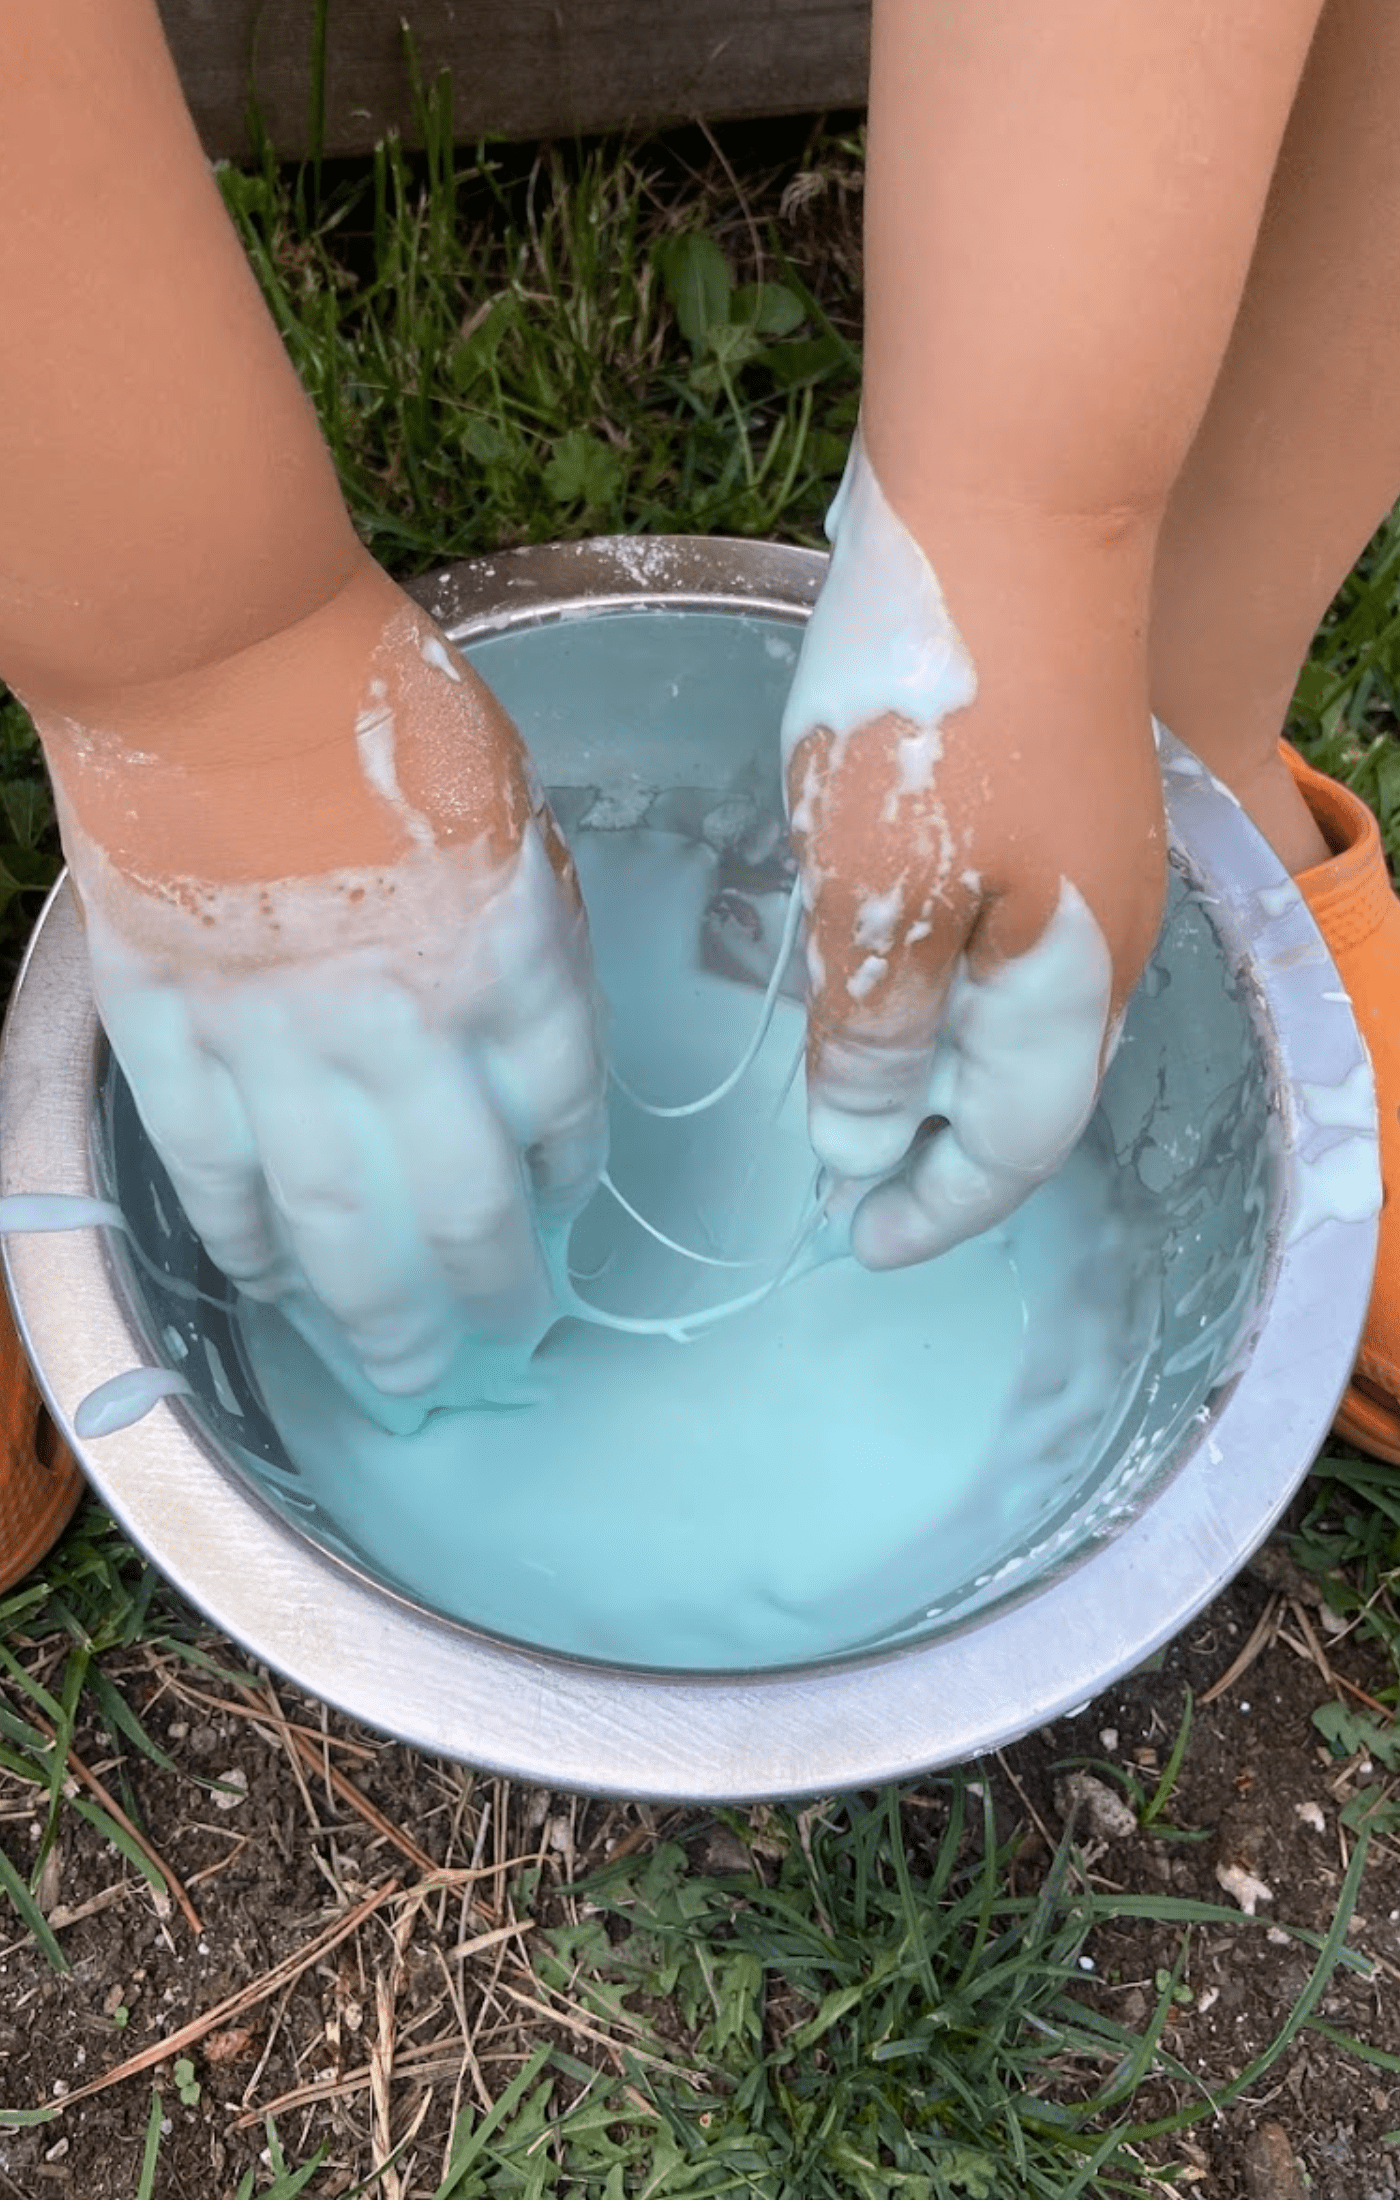
Oobleck is one of those activities that looks almost too simple to be interesting. It is just cornstarch and water. But once a child gets their hands in it, the questions start coming fast. It pours like a liquid, but punch it and it feels like a rock. That tension between what something looks like and how it actually behaves is exactly what makes this such a solid science activity for kids.
This post includes a step-by-step recipe, tips for cleanup, and ideas for turning playtime into a real learning moment. I have also included free printable recipe cards and an observation worksheet at the end, which are great to send home with kids after a class or group activity.
What is oobleck?
Oobleck is a non-Newtonian fluid. That sounds technical, but it just means it does not behave the way most liquids do. A normal liquid, like water or juice, flows at the same rate no matter how you handle it. Oobleck does not follow that rule.
When you move your hand through it slowly, the particles inside have time to shift around each other, and the mixture flows like a liquid. When you apply sudden force, like a quick stir or a firm squeeze, those same particles lock together and the mixture acts like a solid. The substance does not change. The force you apply does.
This is a great concept to introduce even with very young children. You do not need to use the term non-Newtonian right away. Just let them feel the difference between slow and fast movements, and the science will speak for itself.
The name comes from the Dr. Seuss book Bartholomew and the Oobleck, which is a wonderful read-aloud to pair with this activity. Reading the book first gives kids a fun reason to want to make it themselves.
What you need to make oobleck
The ingredient list is short. You need 1.5 cups of cornstarch and 1 cup of room-temperature water. Food coloring is optional, but kids tend to love it. A few drops go a long way.
For equipment, you just need a bowl and a spoon. I also recommend laying down an old towel or some newspaper under the work area. Oobleck is not hard to clean up, but it does travel.
Some people ask whether you can substitute cornstarch with corn flour or baking soda. I have always used cornstarch and recommend sticking with it. The texture and behavior are specific to how cornstarch particles are shaped, and substitutes tend to produce a different consistency.
How to make oobleck
Start by adding the cornstarch to your bowl. If you are using food coloring, stir it into the water before you add anything else. This helps distribute the color evenly. Then slowly pour the water into the cornstarch, starting with about half a cup and adding more gradually.
The key is to go slowly. Pouring too fast makes it harder to get the right consistency. You are aiming for a mixture that feels firm when you press it but flows when you tilt the bowl. If the mixture feels too stiff, add a small splash of water. If it feels too loose, add a bit more cornstarch.
Once the texture feels right, it is ready to play with. Kids can explore it right in the bowl, or you can pour it out onto a tray or flat surface for more room to move around.
Guiding the science as they play
Open-ended play is valuable on its own, but a few well-placed questions can turn this into a richer science activity for preschoolers. You do not need a formal lesson plan. Just ask questions and let curiosity do the work.
Try asking what happens when they dip one finger in very slowly, versus what happens when they jab at it quickly. Ask if it is a liquid or a solid, and whether they can explain why. Ask them to try rolling it into a ball in their palms, then set it down and watch what happens. That moment when the ball slowly melts back into a puddle tends to get a big reaction.
You can also try pressing toy cars across the surface, or tapping it with a spoon. Each interaction demonstrates the same principle in a slightly different way, which helps the concept stick.
If your child is working through an observation worksheet, this is a good time to pause and have them draw or write what they notice. The free printable at the bottom of this post works well for that.
Can you make oobleck ahead of time?
Yes. Oobleck stores well in a sealed airtight container for several days. Keep it at room temperature. If it separates while sitting, just stir it back together before use. I have used plastic containers for this, but glass works too.
One thing to note is that oobleck can dry out a bit over time. If that happens, add a small amount of water and stir slowly until the texture comes back.
How to clean up oobleck
Cleanup is easier than it looks during the activity. Because cornstarch is biodegradable, you can break the mixture apart with a spoon and add it to the compost bin. Any residue left on bowls, trays, or counters wipes up well with warm water.
If oobleck ends up on the carpet, do not panic. Let it dry completely first, then vacuum it up. It comes out cleanly once it is dry. Trying to wipe it while wet just spreads it around.
For clothes, a rinse with cool water and a normal wash cycle handles it well.
Is oobleck safe if a child tastes it?
Cornstarch is non-toxic, so a small taste is not a cause for concern. It will not taste good, but it will not cause harm. If a child ingests a larger amount, contact a poison control center as a precaution, though the risk is low.
Ideas for extending the learning
If you want to go a bit further than sensory play, there are a few easy ways to add depth to this activity. Pairing it with Bartholomew and the Oobleck is one of my favorites. Read the book first, then ask kids whether they think they could make their own version. It builds anticipation and gives the activity context.
You can also connect this to a broader unit on states of matter. Oobleck is a great example of why matter does not always fit neatly into the categories of solid, liquid, or gas. That conversation alone can spark a lot of curiosity. Check out more ideas in our full collection of simple science experiments for kids if you want to keep the momentum going.
For older kids, you can introduce the scientific method by having them make a prediction before they touch it, then test their hypothesis through play, and finally record what they observed. The free observation worksheet below supports exactly that process.
If you want a seasonal twist, try adding themed mix-ins like small plastic spiders, googly eyes, or mini pumpkins for Halloween. A few drops of orange or black food coloring makes it feel festive. The science stays the same, but the presentation gives it a fresh angle.
Free printables
I have included a free oobleck observation worksheet and a printable recipe card with this post. The recipe cards are handy to send home with children after a class activity. Laminating them is a good idea since this experiment tends to get wet. Both printables are available to download below.
Looking for more hands-on activities for kids? Browse the full collection on the site for science experiments, crafts, outdoor learning, and more.


Leave a Reply