
This coffee filter butterfly craft is one of those projects that looks impressive but takes almost no time and uses supplies you probably already have. All you need are two coffee filters, some washable markers, a pipe cleaner, and water. That’s it.
The results are colorful and genuinely pretty. The colors bleed and blend in ways that feel almost magical, and kids find the whole process fascinating to watch. It works well for toddlers, preschoolers, and older kids alike. You can find more projects like this in the arts and crafts section of the site.
What you need
The supply list is short. For each butterfly, you need two coffee filters and one pipe cleaner. You also need washable markers in a few colors, and something to apply water with. An eye dropper gives you the most control, but a small spray bottle works just as well. Place your filters on a plate, a cookie sheet, or a sheet of wax paper before you start. The markers will bleed through the filters, so protecting the surface underneath matters.
Basket-style or round filters both work. The shape does not really affect the final result. What matters is that the filters are paper so the color can spread.
How to make the butterflies
Step 1: Stack your filters
Place two coffee filters directly on top of each other on your protected surface. They will be colored and folded together, so stacking them from the start keeps things simple.
Step 2: Draw on the top filter
Use washable markers to draw designs on the top filter. There is no wrong way to do this. Swirls, dots, stripes, and patches of solid color all work well. Encourage kids to use several colors. One tip worth knowing: colors that sit across from each other on the color wheel tend to turn muddy when they blend. Red next to green, blue next to orange, and yellow next to purple can all turn brownish. Colors that sit near each other, like red and orange or blue and purple, blend beautifully.
Step 3: Add water
Use the eye dropper or spray bottle to add water across the whole design. You want enough water that the colors spread and bleed through both filters. Don’t worry if your child goes heavy on the water. The filters will dry completely before the next step, so extra water just means more spreading, which usually looks great.
Step 4: Let them dry
Set the filters somewhere they can dry fully. A sunny windowsill or outside on a warm day works well. On a warm, sunny day this can take as little as ten minutes. On a cooler or overcast day, plan for closer to thirty minutes. The filters need to be completely dry before you fold them, or the fan folds will stick together.
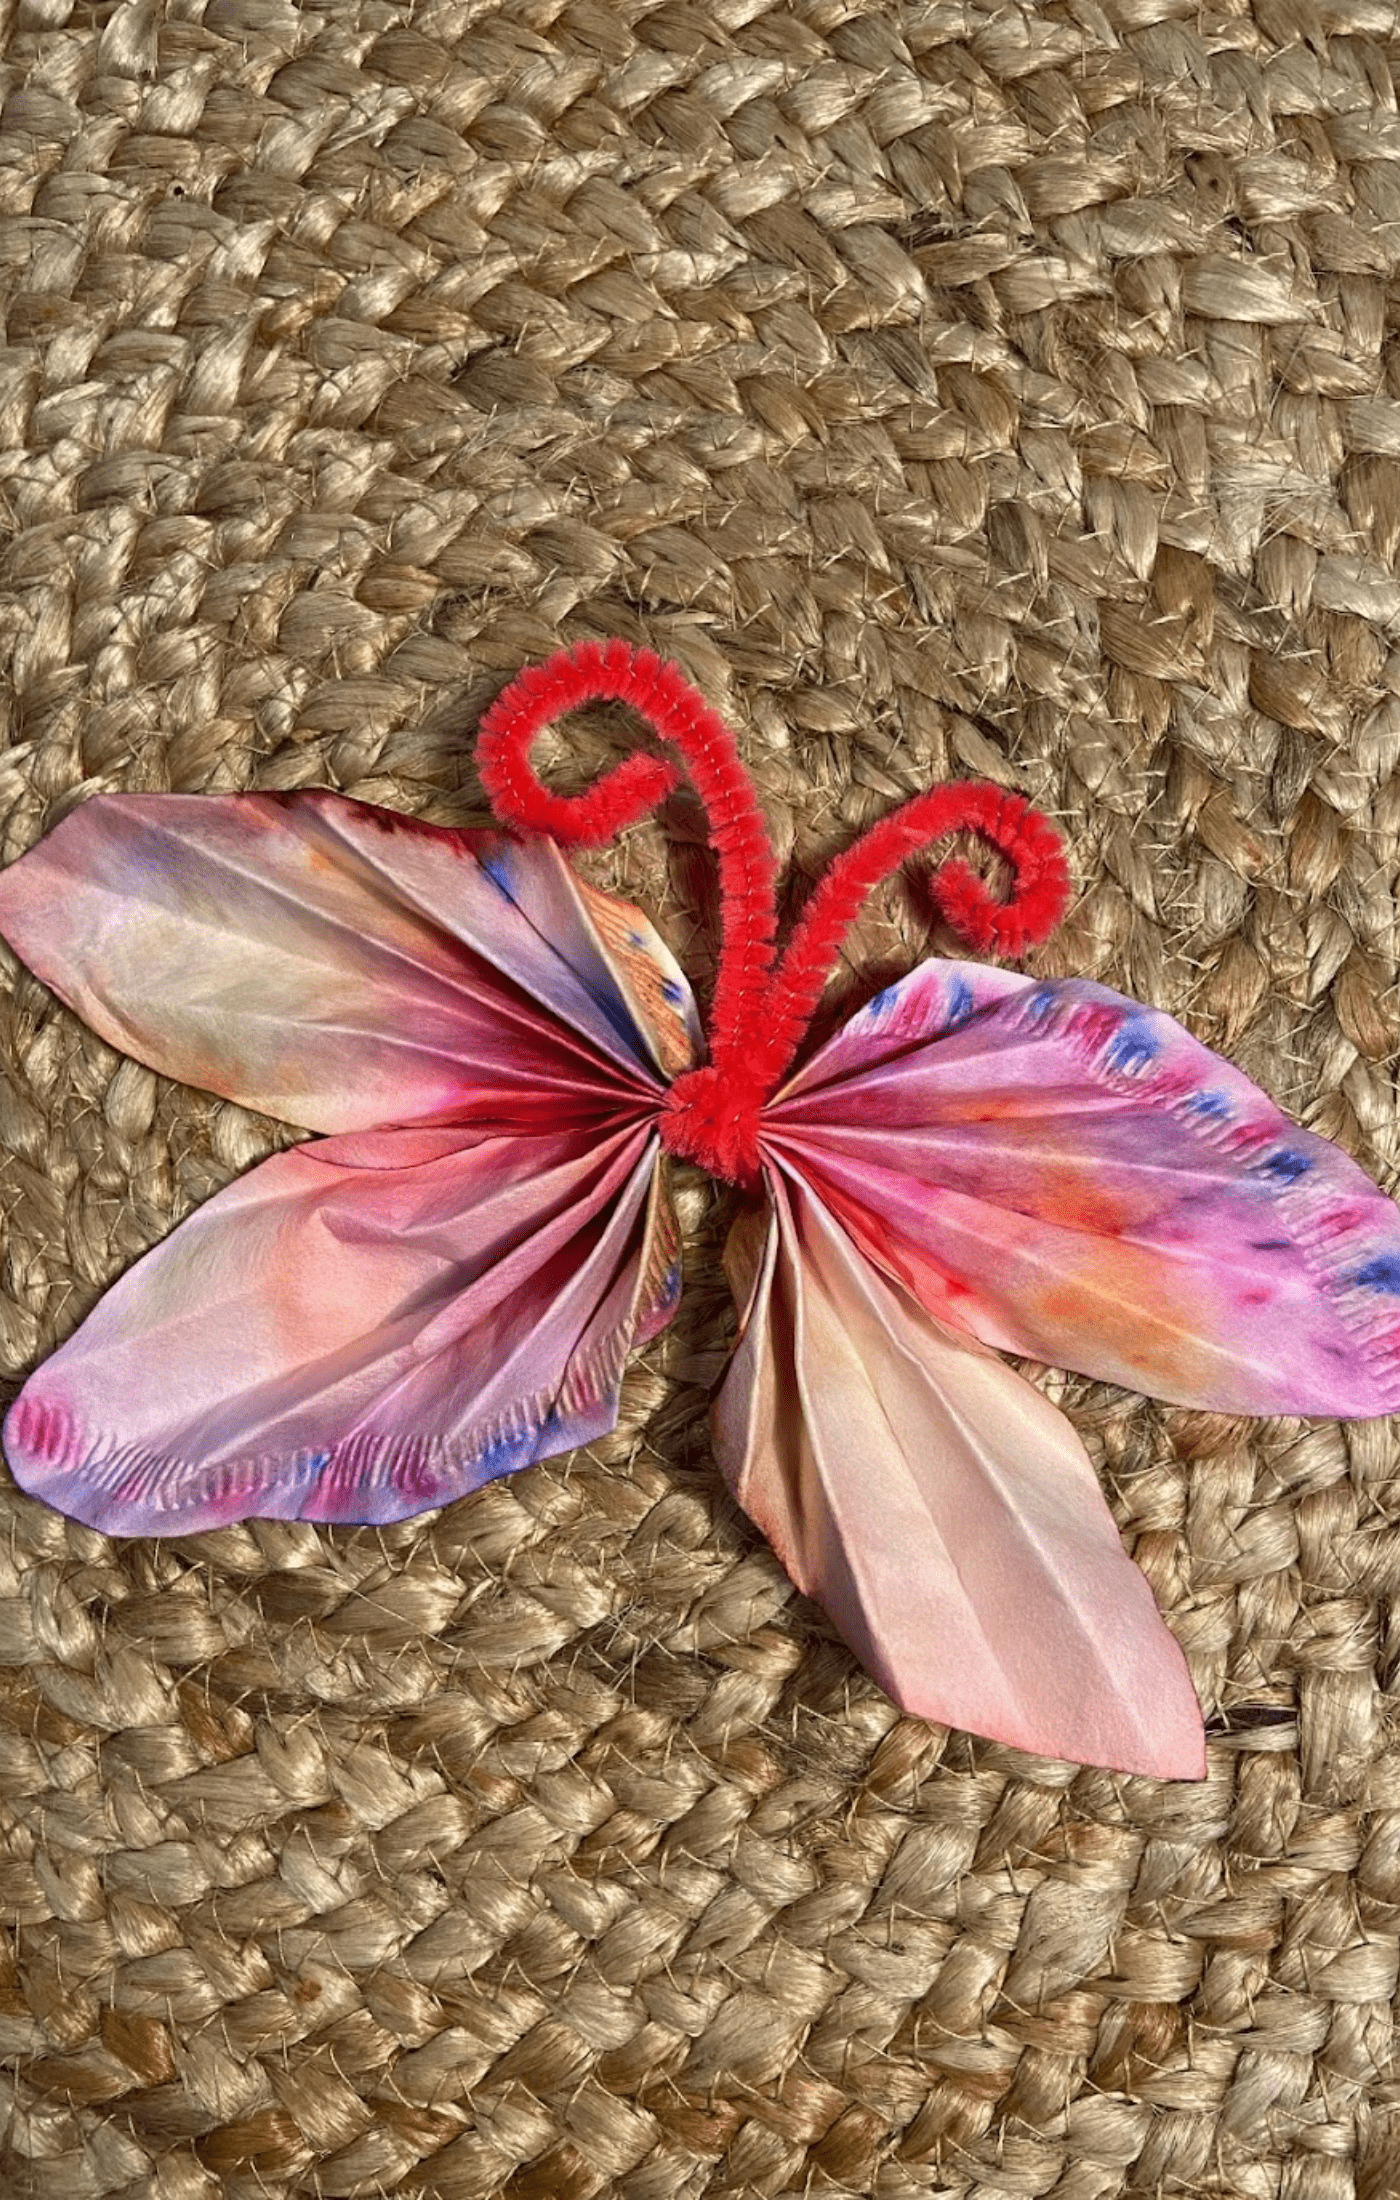
Step 5: Fan fold the filters
Once dry, fold each filter into an accordion or fan fold, one at a time. Fold the entire filter from one edge to the other. Each folded filter will become one pair of wings, with one being slightly larger than the other if you want a more realistic look. If you want all four wings to be the same size, fold both filters the same way.
Step 6: Stack and secure
Place the two folded filters on top of each other. Wrap a pipe cleaner around the center of the stacked filters and twist it firmly to hold everything in place. Pull the pipe cleaner snug so the filters fan out on both sides like wings.
Step 7: Shape the antennae
The two ends of the pipe cleaner sticking up become the antennae. You can curl the tips into small spirals, bend them into simple loops, or thread a small bead onto each one for a more finished look. Any of these options work well. Let your child decide how they want theirs to look.
A few things worth knowing
This craft is a good opportunity to talk about symmetry with older kids. Butterfly wings are symmetrical in real life, meaning both sides mirror each other. Since the color blending in this craft is random, the finished wings will have a tie-dye effect rather than a perfect mirror pattern. That is part of what makes each butterfly unique. It is worth pointing out to kids rather than letting them feel like something went wrong.
If you want to use this project to explore color mixing, try using only two or three colors and observing where they blend. This pairs well with other science activities for preschoolers that involve color and water.
A clothespin can replace the pipe cleaner in the center if you prefer. Plain clothespins look nice as is, or you can paint them beforehand. This also makes the butterfly easier to clip onto a string or branch for display.
Ways to use the finished butterflies
These butterflies look lovely hung from a window, strung along a garland, or clipped to a branch in a vase. Making a whole batch in an afternoon and hanging them together creates a really striking display. They also work well as decorations for a spring or garden-themed party.
If your child enjoys this kind of project, the easy crafts for kids collection has plenty more ideas at a similar skill level. The preschool nature crafts post is also worth a look if you want to keep the nature theme going.
Quick supply list
For each butterfly you need two coffee filters, one pipe cleaner, washable markers in several colors, an eye dropper or small spray bottle, and a tray or sheet of wax paper to protect your surface. That is everything. No special tools, no trip to the craft store required.
This is one of those crafts that earns its place in regular rotation. It is fast, the cleanup is easy, and the finished result is something kids are genuinely proud of. Once you make a few, you will probably find yourself making a whole collection.


Leave a Reply