
Crafting with kids doesn’t have to be complicated. The best projects use simple supplies, come together quickly, and give children something they’re proud of at the end. These ten crafts fit all of those requirements. They work for a wide range of ages, and most of them can be done with things you already have at home.
Easy crafts for kids to try at home
The crafts below are sorted loosely by what you’ll need and what skills they involve. Fine motor practice shows up naturally in almost all of them, which is a bonus for younger children. You don’t need a fully stocked craft room to get started. A few basic supplies go a long way.
1. Nature collage
This one pairs well with a walk outside. Bring a small basket and collect fallen items along the way. Leaves, flowers, seed pods, and small twigs all work well. Once you’re back home, children can arrange the items on a flat surface to create a picture or pattern.
For a version you can keep, dry the materials first by pressing them between heavy books for a few days. Then glue them onto cardstock or thick paper. Flat items like leaves and pressed flowers fit well inside a standard frame. For bulkier items like pinecones or acorns, a shadow box works better.
You can also skip the drying step entirely and just arrange the materials on the ground outside. That version is just as satisfying, even if it doesn’t last. If your child loves spending time in nature, check out these preschool nature crafts for more ideas along the same lines.
2. Coffee filter butterflies
This is one of the easiest crafts on this list in terms of supplies. You need coffee filters, washable markers, pipe cleaners, and a spray bottle with water. That’s it.
Stack two filters together on a tray or baking pan. Have your child draw designs across the top filter using washable markers. Then spray the filters lightly with water and watch the colors bleed and blend together. Once dry, separate the filters and fold each one accordion style. Stack them together to form two wings, then pinch them in the middle and twist a pipe cleaner around the center. Bend the ends of the pipe cleaner up to make antennae.
The full step-by-step walkthrough with photos is in the coffee filter butterfly craft post. Tissue paper works as a substitute if you don’t have coffee filters, though the water and marker technique won’t transfer the same way.
3. Handprint cards
Handprint art turns into a meaningful keepsake very quickly. Paint a child’s hand with washable, non-toxic paint and press it onto cardstock. That’s the foundation. From there, you can add details with markers or extra paint to turn the handprint into something recognizable, like a Christmas tree, a turkey, or a simple flower.
Cardstock holds up better than construction paper for cards, especially if they’re going in the mail. If you’re making a batch, have the child write one message and photocopy it for each card. This keeps the writing personal without exhausting small hands. For children who are still learning to write, trace the letters lightly in highlighter first. They can write over it, and the highlighter won’t show up when photocopied.
4. Paper plate animals
Paper plates make a sturdy base for animal crafts. Children can cut or tear the plate into a basic shape, then use markers, paint, or torn paper to decorate it. Washable paints from brands like Crayola work well here. Acrylic paint is harder to clean once it dries, so it’s worth avoiding for younger children.
The animal can be as simple or detailed as the child wants. Some kids are happy to draw on a face and call it done. Others want to add feathers, yarn, or paper ears. Both approaches work fine.
5. Paper plate masks
This craft takes the paper plate one step further. Cut eye holes into the plate, then let children decorate the front however they like. You can attach ribbon through small holes on each side to tie around the head, or glue a wide craft stick to the bottom so the child can hold it up in front of their face.
Masks like these tend to lead straight into imaginative play, which extends the value of the craft well past the making part. If your child is interested in drama and pretend play, you might also enjoy this roundup of dramatic play toys for preschoolers.
6. Egg carton creatures
Egg cartons are one of the most useful craft materials you can save from recycling. Cut individual cups out of the carton to use as the body of a small creature. An adult should handle the cutting since egg carton cardboard is tough. Paint the cups in whatever colors your child chooses, let them dry, then add googly eyes and other embellishments.
Hot glue works well for attaching details, but that step belongs to an adult. White school glue is a fine alternative for anything that doesn’t need to bond immediately. Children often play with these little creatures long after the craft session ends.
7. Toilet paper roll binoculars
Save two toilet paper tubes and tape them side by side. That’s the core of this craft. Children can decorate the outside with markers, stickers, or paint. Punch a small hole on the outer edge of each tube, then thread a piece of string through both ends so the binoculars can hang around the neck.
This craft works especially well before a nature walk or a backyard exploration session. It gives children a sense of purpose and makes them feel like they’re headed out on a real expedition.
8. Popsicle stick puppets
Popsicle sticks are endlessly versatile. For puppets, children can draw a character directly onto a stick, or cut out a shape from paper and glue it to the top of the stick. Animals, people, food, and fictional characters all work well.
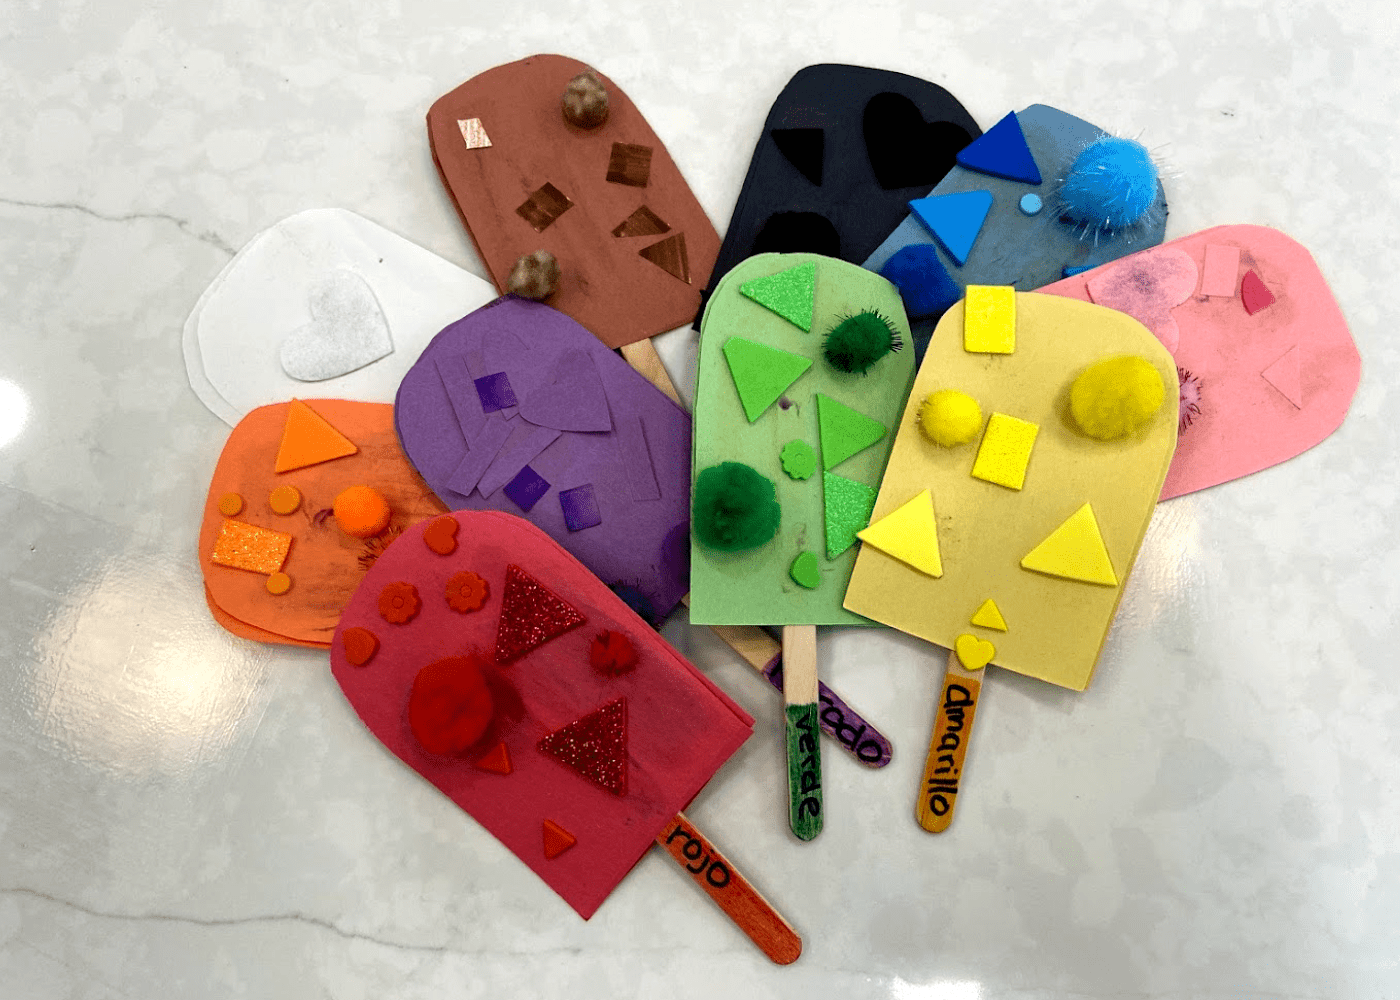
One fun variation is to make pretend popsicles in different colors and use them as a learning tool. Children can practice color names, practice counting, or sort the sticks by category. It takes almost no supplies and the puppets can be used again and again in pretend play.
9. DIY rain gauge
This craft teaches basic weather science and takes about five minutes to assemble. Cut the top off a plastic bottle and flip it upside down inside the lower half to act as a funnel. Use a permanent marker to draw horizontal lines every centimeter along the outside of the bottle. Place a few small rocks in the bottom to keep it stable outdoors.
Start measuring from the first line above the rocks rather than from the very bottom, since the rocks displace some water and affect accuracy. After it rains, children can check the gauge and record how much water collected. It’s simple, and kids find it surprisingly satisfying to check. The full details for this project are in the DIY rain gauge post.
10. Cardboard tube cars
A cardboard tube becomes a car with a few additions. Cut wheels from cardboard scraps, bottle caps, or foam, then glue them to the sides of the tube. Children can paint or draw on details like windows and doors. The cars can be as simple or as decorated as the child wants.
To add a learning element, write numbers on small strips of paper and tape one to each car. Then draw numbered parking spots on a piece of cardstock. Children match each car to its correct space. It’s an easy way to weave number recognition into play without making it feel like a lesson.
How to make craft time go smoothly
A little preparation makes a noticeable difference when crafting with kids. Setting up a dedicated space helps contain the mess and signals to children that craft time is starting. It doesn’t need to be elaborate. A corner of the table with a plastic mat underneath works just fine.
Gather all the supplies before you call children over. Waiting around while an adult hunts for scissors or glue is frustrating for young children, and it breaks momentum. If a project requires any adult prep like cutting shapes or setting up materials, do that first.
Choose crafts that match your child’s current ability. A project that needs too much adult help stops being fun for the child. Younger children do well with painting, stamping, and simple assembly. Older children can handle more steps, finer details, and more complex materials.
Try to focus on the process rather than the outcome. The finished product probably won’t match the photo you saw online, and that’s perfectly fine. What children gain from crafting, including focus, creativity, and hand strength, comes from the doing, not the result. Stay nearby for safety, offer help when asked, and give them room to make their own choices about how the craft looks.
Storing craft supplies
Craft supplies have a way of multiplying quickly. Paper scraps, pipe cleaners, googly eyes, and paint tubes can take over a drawer or shelf without much effort. A little organization makes craft time faster to set up and easier to clean up. For a full set of ideas, the kids craft storage post is a good place to start.
Clear bins and containers are worth the investment. When children can see what’s inside without opening everything, they’re less likely to dump an entire bin looking for one item. Label each container clearly, and involve children in learning where things belong.
For paper, a simple file folder system works well. Keep one folder for scrap paper, one for construction paper, and one for specialty papers like tissue or origami. Standing them upright in a magazine file keeps everything visible and easy to grab.
A large binder with sheet protectors is a practical way to store finished artwork. Children can decorate the cover and treat it as their own portfolio. It keeps flat artwork off the floor and out of piles, and it’s something worth holding onto as kids grow.
Crafting doesn’t need a big budget or a lot of time to be worthwhile. These ten projects cover a range of skills and ages, and most of them connect naturally to play, learning, or the outdoors. Pick one that fits what you have on hand today and go from there.


