
This paint drip Christmas craft is one of those rare projects that looks impressive but takes very little skill. You pour paint into a clear plastic ornament, swirl it around, and let it dry. That’s really all there is to it. Kids love watching the colors move inside the ornament, and the finished result is something you’ll actually want to hang on the tree.
This makes a great gift from a child to a parent or grandparent. It also works well for a classroom craft, a holiday party activity, or just a quiet afternoon project at home. If you’re looking for more ideas, we’ve rounded up 14 Christmas ornament crafts for kids that are all worth a look.
What you need
The supply list for this craft is short. You need clear plastic Christmas ornaments, which are widely available at craft stores and big-box retailers in the lead-up to the holidays. You also need non-toxic acrylic paint in whatever colors you like. Classic Christmas colors work well, but there’s no rule against going bold with bright pinks or purples.
Beyond the ornaments and paint, you’ll want to lay down a craft mat or some newspaper to protect your work surface. Paint clothes or an art apron are a good idea for kids. Have some masking tape on hand to seal the ornament tops while the paint dries. A popsicle stick or an old paintbrush is helpful for nudging paint down into the ornament if it doesn’t drip on its own. A few paper towels nearby never hurts either.
Read the labels on your paint before you start. Some acrylic paints are not suited for young children. Choose a paint that’s clearly marked as non-toxic and safe for kids. Adult supervision is important throughout this craft, especially when small ornament caps are involved.
How to make paint drip ornaments
Remove the ornament cap
The cap on most clear plastic ornaments is held in place by a small wire that acts like a spring. It comes out with a gentle pull. For younger children, an adult should remove all the caps before the craft begins. Set the caps aside somewhere they won’t roll away.
Choose your paint colors
Let each child pick two or three colors. Too many colors can muddy the final result, so a small selection works better. Warm reds, deep greens, gold, and white all look beautiful inside a clear ornament. If your child wants to go a different direction, let them. These ornaments look great in any color combination.
Drip paint into the ornament
Pour a small amount of paint directly into the opening of the ornament. Add one color at a time. If the paint is thick and doesn’t drip down on its own, use a popsicle stick or the back of a paintbrush to gently push it toward the center. You don’t need a lot of paint. A little goes a long way once it starts to spread.
Seal and swirl
Once you’ve added all your colors, replace the cap. Wrap the top with a small piece of masking tape to keep it from popping off and letting paint leak while you work. Then gently swirl and tilt the ornament to move the paint around inside. This is the part kids enjoy most. The colors blend and shift as the ornament turns, and no two ornaments ever come out the same way.
Let the ornaments dry
Set the ornaments somewhere safe to dry. Drying time varies depending on how much paint you used and how thick it was. Most ornaments take one to two days to dry fully. If drying is slow, you can remove the cap to let air in and speed things up. Once the paint is dry, the ornament is ready to hang.
Tips for a good result
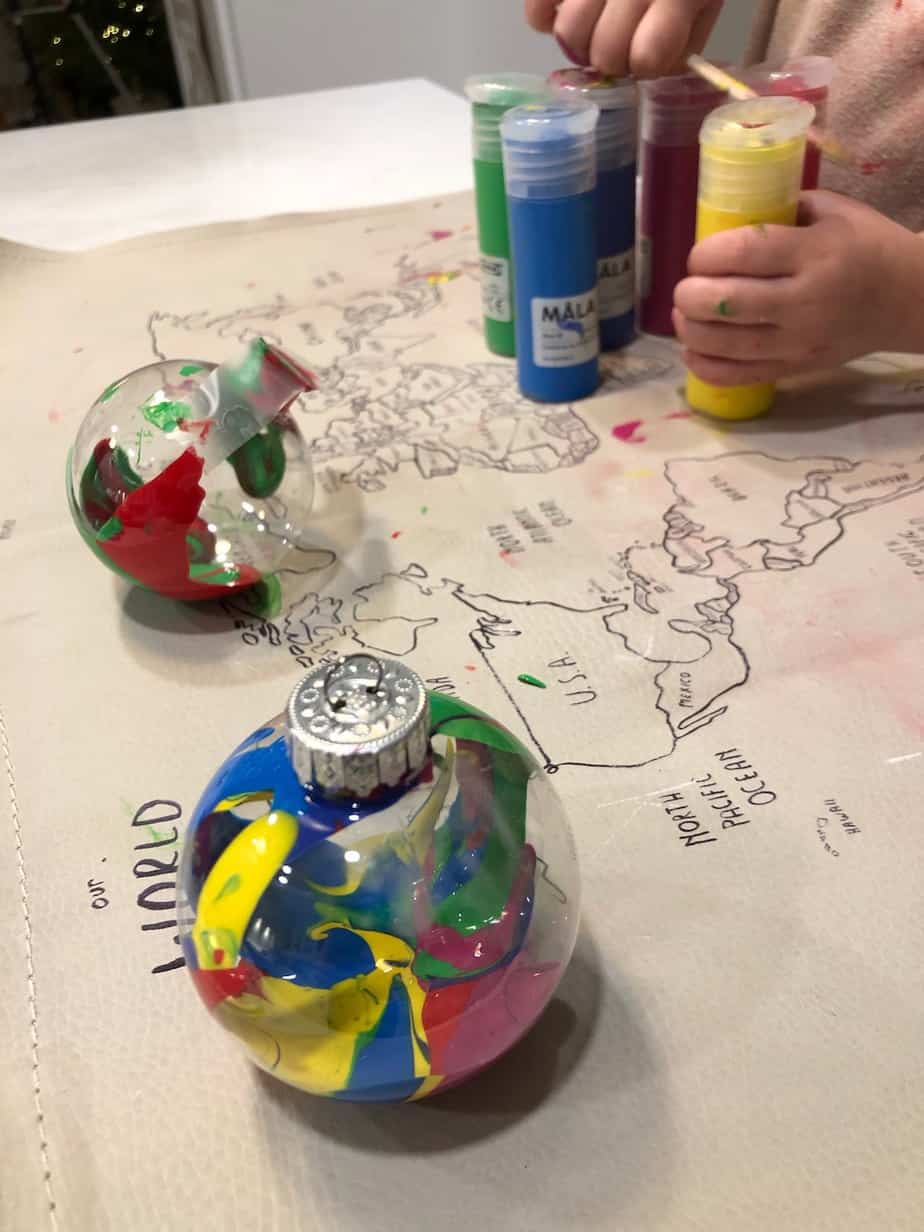
Thicker paint tends to create more defined drips and a more interesting finished look. The IKEA MALA paint works well for this reason. Watery paint can pool at the bottom and look flat once it dries.
Don’t overfill the ornament. A small amount of paint is enough to coat the inside and create a beautiful effect. Too much paint takes forever to dry and can stay tacky.
This craft works best on a flat, protected surface. Once the ornaments are swirled and sealed, stand them upright or lay them gently on their side. Moving them around too much before the paint settles can cause colors to mix more than you want.
If you’re doing this craft with a group, set up individual stations with small cups of pre-poured paint so kids aren’t sharing directly from the bottles. It keeps things cleaner and makes the process faster.
More ornament crafts to try
If your family enjoys making ornaments together, there are plenty of other projects worth trying this season. Pom pom star ornaments are simple and satisfying, and piñata Christmas tree ornaments are a fun twist on a classic shape. Children’s clay Christmas ornaments are wonderful for preserving little handprints, and melted crayon ornaments use up those broken crayons in a creative way.
For even more ideas, the reindeer craft for preschoolers is always a hit, and pipe cleaner Christmas ornaments are great for developing fine motor skills. The felt Christmas tree ornaments with buttons are another favorite for younger kids who love to press and stick things into place.
Making ornaments at home gives kids something to look forward to every year when the decorations come out. A paint drip ornament made at age four looks different and more precious every time you pull it out of storage. That’s the whole point.


Leave a Reply